
CI/CD for Beginners: Build a GitHub Actions and Render Pipeline
Oct 11, 2026
AI can generate a lot of code quickly, but writing code and shipping it safely are two different jobs. The faster code gets produced, the more important it is to have checks that do not depend on someone remembering every step.
In this guide, we will build a practical CI/CD pipeline around a small Express and TypeScript application. Then we will deliberately break it to prove that the safeguards work.
GitHub Actions will run the checks. A GitHub ruleset will stop failing pull requests from merging. Render will wait for CI before starting an automatic deployment. We will also create a temporary preview so we can inspect a change without touching production.
Watch the video version of this tutorial for the full interface walkthrough, and keep the DevStash command and code reference open while you follow along.
Before you start
You need Git, Node.js, a GitHub account, and a Render account. The commands below assume Bash or Zsh. Git Bash works on Windows.
Clone the CI/CD lab starter:
git clone https://github.com/bradtraversy/cicd-lab-starter.git cicd-lab
cd cicd-lab
The starter includes its own Git history. Confirm that your terminal is inside the new cicd-lab folder, then remove that history and initialize a clean repository for your version of the project:
rm -rf .git
git init -b main
This removes only the starter's Git metadata. It does not remove the application files.
Open the folder in your editor. For VS Code:
code .
The sample uses Node.js 24. Check your version before installing dependencies:
node --version
If the version does not start with v24., switch to Node.js 24 before running npm ci. The engines entry in package.json documents the required version, but it does not change the version installed on your machine.
Install the locked dependencies and start the development server:
npm ci
npm run dev
Visit http://localhost:3000 and http://localhost:3000/api/health. The health endpoint should return HTTP 200 with {"status":"ok"}. Stop the development server with Ctrl+C before continuing.
If you use a different supported Node.js version in your own application, keep it consistent in your local environment, GitHub Actions, and Render.
The pipeline in plain English
CI stands for continuous integration. It means that changes are integrated into a shared codebase regularly and checked automatically. Those checks might include type checking and tests. They can also include linting or a production build.
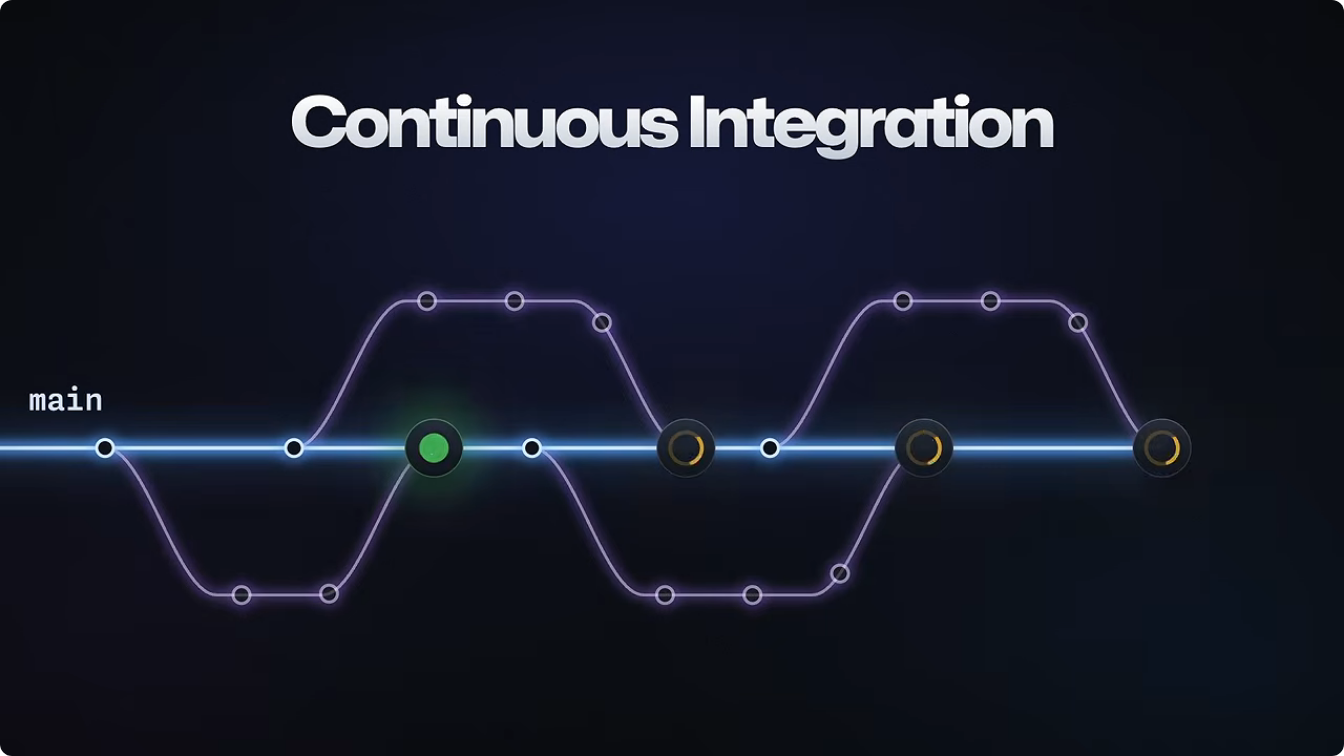
Feature branches repeatedly merge into main, where CI checks each integration.
CD commonly means continuous delivery or continuous deployment. Both move checked code toward production, but there is an important difference:
- Continuous delivery leaves a manual release decision before production.
- Continuous deployment releases automatically after the required conditions pass.
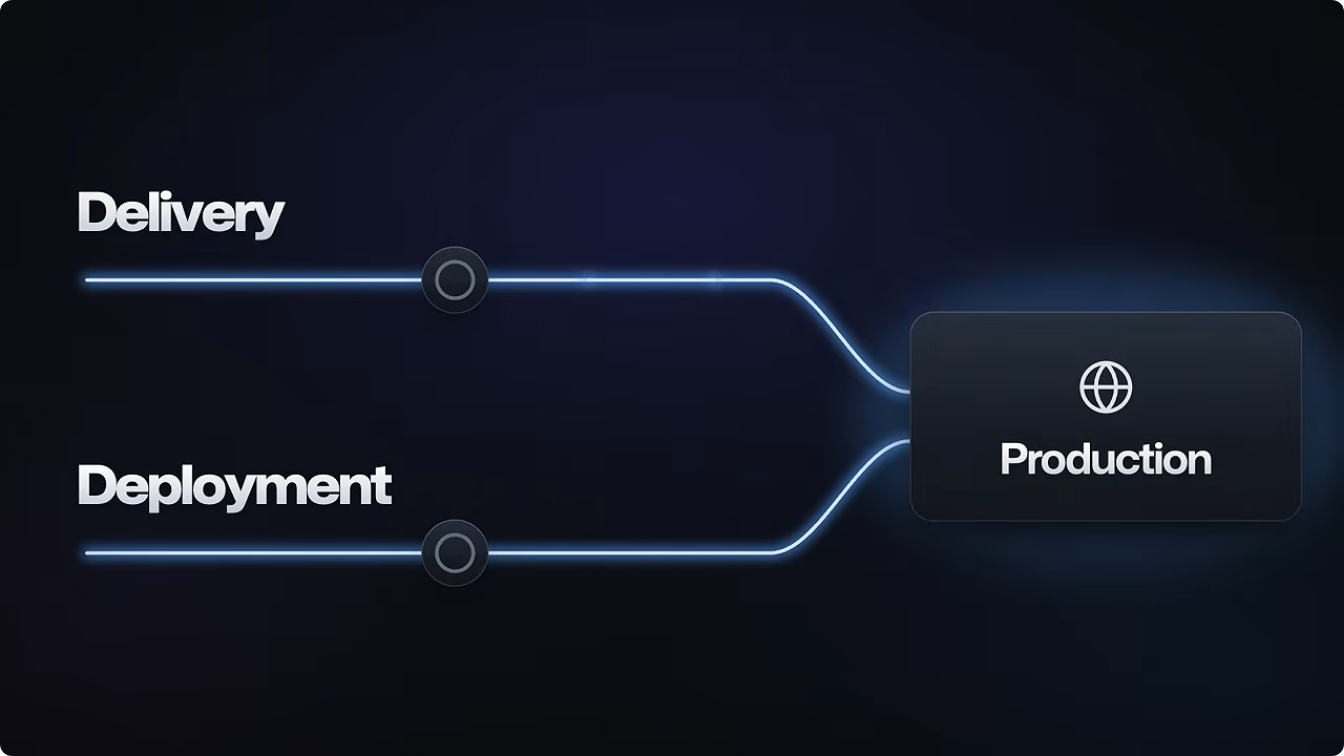
Continuous delivery pauses for a release decision. Continuous deployment continues automatically when its required conditions pass.
We are using continuous deployment in this project. A passing CI result does not put the new version into production by itself. It allows Render to begin an automatic deployment attempt, which still has to build, start, and pass its health check.
The complete flow looks like this:
Local verify
    -> Pull request
    -> GitHub Actions
    -> Required status check
    -> Merge to main
    -> CI on main
    -> Render build and start
    -> Health check
    -> Production traffic
The local script defines what the application must pass. GitHub Actions runs that contract in a clean environment. A GitHub ruleset enforces it before merge. Render uses the result on main as a condition for automatic deployment.
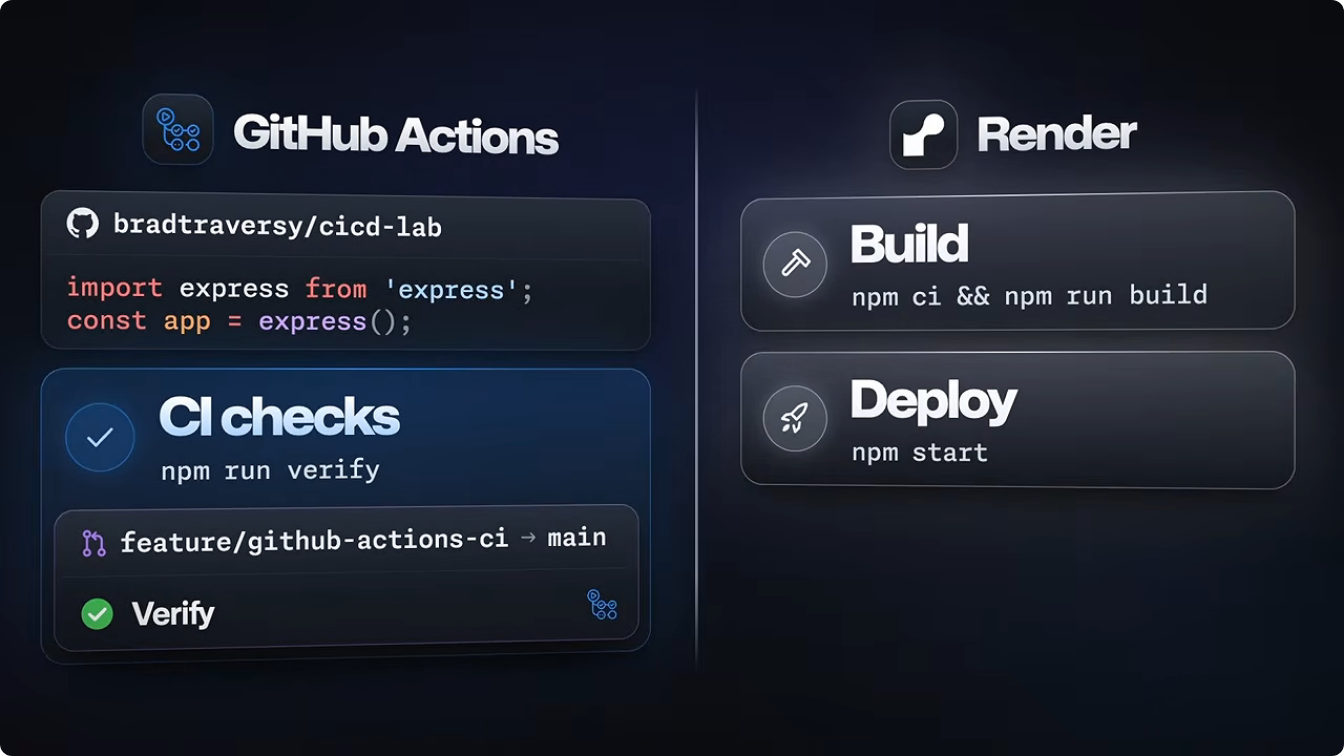
GitHub Actions verifies the change. Render owns the build and deployment after the required checks pass.
Start with one verification command
The sample application is intentionally small. It has an Express server, an HTML home page, and a health endpoint. That gives us enough behavior to test without burying the CI/CD lesson under application code.
The starter already has scripts for type checking, testing, building, and running the production server:
{
  "scripts": {
    "dev": "tsx watch src/server.ts",
    "typecheck": "tsc --noEmit",
    "test": "node --import tsx --test test/app.test.ts",
    "build": "tsc",
    "start": "node dist/server.js"
  }
}
Each command catches a different class of problem. The type check catches TypeScript errors. The test confirms that the health endpoint returns HTTP 200 and the expected JSON. The build proves that TypeScript can produce the JavaScript files needed in production.
Rather than making developers and automated services remember three separate commands, add verify inside the existing scripts object in package.json. The resulting object should look like this:
{
  "scripts": {
    "dev": "tsx watch src/server.ts",
    "typecheck": "tsc --noEmit",
    "test": "node --import tsx --test test/app.test.ts",
    "build": "tsc",
    "start": "node dist/server.js",
    "verify": "npm run typecheck && npm test && npm run build"
  }
}
Now the entire local gate is:
npm run verify
The command should finish with one passing health-endpoint test and a new ignored dist directory containing the compiled JavaScript.
The && operators stop the sequence as soon as a command fails. A type error prevents the tests and build from giving us a misleading green result. A failing test prevents the build from becoming the only thing we notice.
We will run this same command locally and in GitHub Actions. There should not be one definition of acceptable code on your machine and another definition in CI.
We used npm ci when setting up the starter because it installs the dependency tree from the lockfile. That makes it a good fit for CI and production builds where repeatability matters.
Treat that passing run as the baseline. If it does not pass locally, do not expect a clean CI runner to fix it for you.
Commit the starter and connect GitHub
Review the new repository, then commit the starting application:
git status --short
git add .
git commit -m "feat: add starter app with local verification"
Create an empty cicd-lab repository on GitHub without a README, license, or .gitignore. If you use GitHub Free, make the repository public so the later ruleset steps are available.
Connect your local repository and push main. Replace YOUR_USERNAME with your GitHub username:
git remote add origin https://github.com/YOUR_USERNAME/cicd-lab.git
git push -u origin main
Create the initial Render deployment
In Render, create a Node Web Service from your GitHub repository and select the main branch. Leave the root directory blank and use the free instance for this tutorial.
Use this build command:
npm ci && npm run build
Use this start command:
npm start
Set the health check path to /api/health and leave auto-deploy on On Commit for this first deployment. Wait for the deployment to finish, then confirm that the public home page and /api/health both work.
This gives us a working deployment before we add CI. Later, we will change Render so new commits deploy automatically only after their checks pass.
Run the same checks with GitHub Actions
A GitHub Actions runner is a temporary machine that executes a workflow. For this project, GitHub creates a fresh Ubuntu virtual machine for the job and discards it afterward.
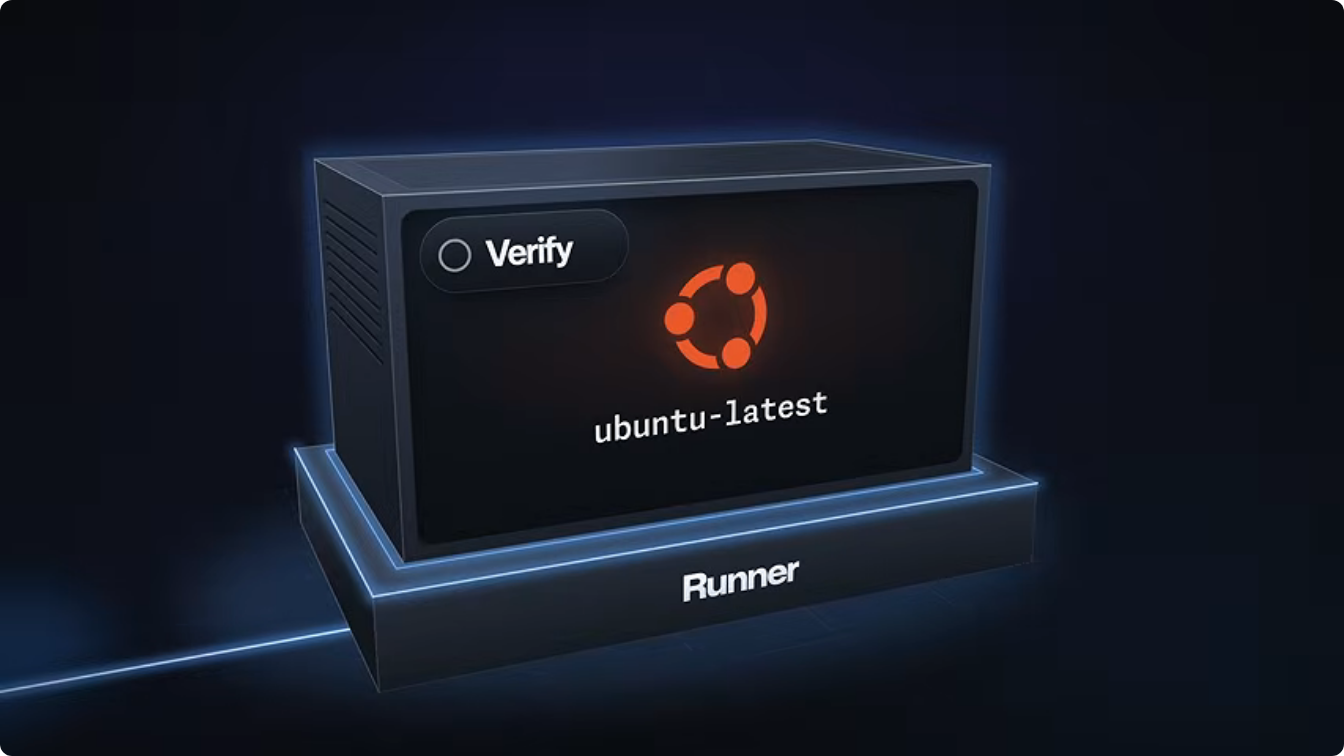
GitHub runs the Verify job on a clean ubuntu-latest runner.
That clean environment is part of the value. A local check can accidentally benefit from an old package, a leftover build, or a service you forgot was running. CI has to make the project work from a fresh checkout.
Start a feature branch and create the workflow directory:
git switch -c feature/github-actions-ci
mkdir -p .github/workflows
Create .github/workflows/ci.yml:
name: CI

on:
  push:
    branches:
      - main
  pull_request:
    branches:
      - main

permissions:
  contents: read

jobs:
  verify:
    name: Verify
    runs-on: ubuntu-latest
    timeout-minutes: 10

    steps:
      - name: Check out repository
        uses: actions/checkout@v7

      - name: Set up Node.js
        uses: actions/setup-node@v7
        with:
          node-version: 24
          cache: npm

      - name: Install dependencies
        run: npm ci

      - name: Verify application
        run: npm run verify
The workflow runs for pull requests targeting main and pushes to main. It grants read-only access to repository contents because this job only needs to check out the code and run commands.
The job checks out the repository, sets up Node.js, installs the locked dependencies, and runs verification. The uses steps run reusable GitHub Actions. The run steps execute shell commands. GitHub's workflow syntax documentation covers the available triggers, permissions, jobs, and steps.
Reproduce the clean installation and verification sequence locally, then commit and push the workflow:
npm ci
npm run verify
git status --short
git add .
git commit -m "ci: add GitHub Actions verification workflow"
git push -u origin feature/github-actions-ci
Open a pull request from feature/github-actions-ci into main. The new Verify job should run against the pull request itself. Open the job in the Actions tab and confirm that checkout, Node setup, dependency installation, and verification all pass.
Merge the pull request using Create a merge commit, then delete the remote branch on GitHub. Bring the workflow into your local main branch and remove the completed local branch:
git switch main
git pull --ff-only
git branch -d feature/github-actions-ci
At this point, GitHub can report a failure. It cannot necessarily stop the merge.
That requires a separate rule.
Protect the merge and automatic deployment separately
The normal path has intentional overlap. If the GitHub ruleset is active and has no bypass, a failing pull request should never reach main. Render's CI condition becomes an independent last condition for automatic deployment when a commit reaches main outside that expected path or the check on the resulting main commit fails.
Require Verify before merging
Repository rulesets require admin access. On GitHub Free, use a public repository for this tutorial. Private-repository rulesets require a plan that supports them.
In the repository settings, create an active ruleset named Protect main with these settings:
Enforcement: Active
Target: Default branch
Require a pull request before merging: Enabled
Required approvals: 0 for this solo lab
Require status checks to pass: Enabled
Required check: Verify
Bypass list: Empty
The approval count is zero because this tutorial is demonstrating an automated quality gate in a solo repository. A team repository can require human approvals too.
The important setting is the required Verify check. GitHub's ruleset documentation explains how required pull requests and status checks restrict updates to a targeted branch.
The workflow should run at least once before you configure the rule so GitHub can offer its check name in the selector.
Make Render wait for CI
The service is currently using On Commit. Once the GitHub Actions workflow exists, change Render's auto-deploy setting to After CI Checks Pass.
Render now waits for the CI checks on the commit before triggering an automatic deployment. That deployment still has to build, start, and pass its health check before the new version receives production traffic. If the candidate fails, the previous healthy version keeps serving traffic. Render documents this sequence in its deployment and health check guides.
This setting controls automatic deployments. An authorized operator can still trigger a manual deployment through Render, so access control and release discipline remain separate safeguards.
Deliberately break the pipeline
A pipeline that has only shown green checks has not proved that it can reject anything.
Create the feature branch used in the video:
git switch -c feature/version-endpoint
Append this test to test/app.test.ts. The endpoint does not exist yet:
test('GET /api/version returns the current version', async () => {
  const response = await fetch(`${baseUrl}/api/version`);

  assert.equal(response.status, 200);
  assert.deepEqual(await response.json(), {
    version: process.env.APP_VERSION ?? 'development',
  });
});
Run the verification command:
npm run verify
The test should fail with HTTP 404 because /api/version does not exist.
Commit and push the failing test:
git add test/app.test.ts
git commit -m "test: demonstrate missing version endpoint"
git push -u origin feature/version-endpoint
Open a pull request from feature/version-endpoint into main, but do not merge it. GitHub Actions runs Verify, reports the failed test, and the active ruleset blocks the merge. Leave the pull request and branch in place because we will fix them shortly.
That proves the first gate works. It does not prove what Render does because the failing commit never reached main.
Optional: prove the Render gate with a fix-forward recovery
The cleanest path is to leave the failing pull request unmerged and continue to the next section. If you also want to prove that Render withholds an automatic deployment when CI fails on main, you can run this extra experiment in the disposable tutorial repository. Do not bypass branch protection in a real production repository for a demonstration.
In GitHub, open Settings > Rules > Rulesets > Protect main, change Enforcement to Disabled, and save. Return to the failing pull request and merge it using Create a merge commit.
The push workflow on main should fail because the version test is now on main without its route. Open Render's Deploys page and confirm that no automatic deployment starts for that commit. The previous production version should remain in place.
That is the narrow result this experiment proves. It does not prevent an authorized person from deploying manually.
Set the Protect main ruleset back to Active immediately. Delete the merged remote feature branch on GitHub, then update local main and create a repair branch:
git switch main
git pull --ff-only
git switch -c fix/version-endpoint
We are going to fix forward instead of reverting. The failing test remains in the project, and the next pull request will add the implementation needed to make it pass. That is a good fit for this controlled lab because the bad commit never deployed and the correction is small. If a bad change is already affecting production or the repair is uncertain, reverting may be the safer recovery.
Fix the feature and use the normal path
If you skipped the optional demonstration, remain on feature/version-endpoint. If you performed it, continue on fix/version-endpoint. The failing test is already present on either branch.
Add the missing route to src/app.ts immediately before export default app:
app.get('/api/version', (_request, response) => {
  response.json({
    version: process.env.APP_VERSION ?? 'development',
  });
});
Run verification again:
npm run verify
The health test and version test should now pass.
Commit and push the fix:
git add src/app.ts
git commit -m "feat: add version endpoint"
If you skipped the optional Render demonstration, push to the existing branch:
git push
The existing pull request updates automatically.
If you performed the optional demonstration, publish the repair branch:
git push -u origin fix/version-endpoint
Open a new pull request from fix/version-endpoint into main.
Whichever path you followed, wait for Verify to pass on the current pull request, merge it using Create a merge commit, and delete the remote feature branch.
If you skipped the optional demonstration, update local main and remove the completed branch:
git switch main
git pull --ff-only
git branch -d feature/version-endpoint
If you performed the optional demonstration, update local main and remove both completed local branches:
git switch main
git pull --ff-only
git branch -d fix/version-endpoint
git branch -d feature/version-endpoint
After Render finishes the automatic deployment, open /api/version on the public service. With no APP_VERSION configured, it should return:
{"version":"development"}
That sequence gives us stronger evidence than a successful deployment alone. We know the system rejects a known-bad change and still accepts the corrected one.
Preview a change before production
Automated checks can verify only the expectations we encode. Sometimes we need to open the application and look at the result.
A pull request preview gives the proposed change a temporary deployment and URL while production remains unchanged. Render can create previews automatically for pull requests or only for selected pull requests. The available modes and cleanup behavior are covered in the service previews documentation.
Render copies the base service's settings into a preview when it is created, including environment variables and database connection information. For a real application, review those copied secrets and point the preview at isolated test or staging resources before using it. Preview instances can also create additional cost, so check the price shown in the dashboard before enabling them.
For this lab, open the service's Previews tab and set Pull Request Previews to Automatic. Then create the branch used in the video:
git switch -c feature/hello
In src/app.ts, add this line directly under the existing <h1> inside the home-page template:
<h2>Hello World</h2>
Verify, commit, and push the change:
npm run verify
git add src/app.ts
git commit -m "feat: add Hello World preview"
git push -u origin feature/hello
Open a pull request from feature/hello into main, but do not merge it yet. Wait for Verify and the preview deployment. On GitHub, open the preview through View deployment, or use the service's Previews tab in Render.
The preview should show the new heading while the production URL remains unchanged. After checking both URLs, merge the pull request using Create a merge commit and delete the remote branch. Then clean up locally:
git switch main
git pull --ff-only
git branch -d feature/hello
Render should remove the temporary preview after the pull request is merged. When the normal deployment finishes, the production URL should show Hello World too.
What this pipeline does not prove
A green pipeline does not mean the application has no defects. It means the application passed the checks you defined.
This beginner pipeline checks types, two HTTP behaviors, and the production build. A larger application may also need linting and database-backed integration tests. It may need migration checks or post-deployment smoke tests too. Add them when the application creates a real need for them.
The developer or team decides what evidence a release requires. The pipeline makes sure nobody quietly skips that evidence when code moves toward production.
Your CI/CD checklist
- One local verification command defines the required checks.
- CI runs that same command for pull requests and
main. - Repository rules require the check before merge.
- Automatic deployment waits for the check on the deployment branch.
For a condensed safe-path command reference, use the complete DevStash companion. The optional Render gate demonstration above mirrors the extra experiment from the video but uses a fix-forward recovery instead of a revert.
Stay connected with news and updates!
Join our mailing list to receive the latest news and updates from our team.
Don't worry, your information will not be shared.
We hate SPAM. We will never sell your information, for any reason.