MERN Crash Course (Part 2) - React Frontend UI, State Management With Redux Toolkit
May 15, 2023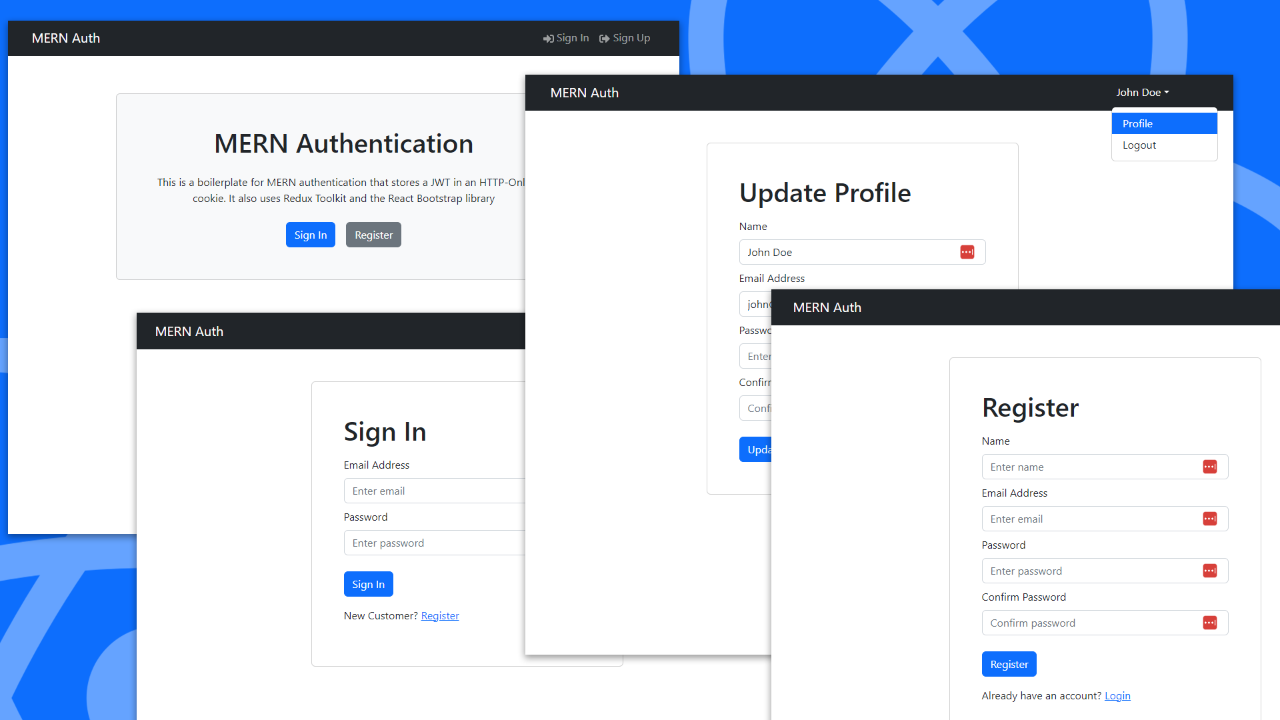
This is part two of a two-part series on how to implement a MERN stack app with an authentication system using JWTs and HTTP-only cookies. In this part, we will be creating the frontend React application to consume the API we built in part one. We will use Redux Toolkit for state management.
Create A New React App
We are going to use Vite to create our React SPA (Single Page Application). Vite is a new build tool that is much faster than Create React App. It is also very easy to use. To install Vite, run the following command from the root of your project:
npm create vite@latest frontend
This will create a new folder called frontend and install all the dependencies for a React app.
Go into the frontend folder and run npm install to install all the dependencies.
If you are using Git, you should move the .gitignore file from the frontend folder to the root of your project. Replace the one you already have there, just add .env to the new one.
Vite Config
Open the vite.config.js file and add a server object with the following values:
export default defineConfig({
  plugins: [react()],
  server: {
    port: 3000,
    proxy: {
      '/api': {
        target: 'http://localhost:5000',
        changeOrigin: true,
      },
    },
  },
});
This will make the server start on port 3000 and proxy all requests to /api to port 5000. This is the port our backend server will be running on.
Client Script
I want to be able to run the frontend React dev server from the root directory. So in the ROOT package.json, add the following script:
"scripts": {
   "client": "npm run dev --prefix frontend",
}
Concurrently Setup
I also want a script that will run both the backend api along with the frontend dev server. To do this, we will use the concurrently package. From the root, install it with the following command:
npm install -D concurrently
Then we want to add a script to run both the front and backend. The scripts in your package.json should look like this:
"scripts": {
    "start": "node backend/server.js",
    "server": "nodemon backend/server.js",
    "client": "npm start --prefix frontend",
    "dev": "concurrently \"npm run server\" \"npm run client\""
  },
Now fron the root, you can run npm run dev and it will start both the backend and frontend dev servers.
You should see the landing page at http://localhost:3000/ and you should be able to access the api on port 5000.
Clean Up
I usually like to clean up some of the boilerplate code. Vite doesn't have much, but I will delete the App.css file and clear out the index.css file.
Open up App.jsx and just make it a simple component with an h1 tag that says "Hello World".
const App = () => {
  return <h1>Hello World</h1>;
};

export default App;
Install React Bootstrap
We are going to use Bootstrap and the React Bootstrap UI library, which allows us to use Bootrtap Components as React components. We will also use the react-icons package for font awesome icons. From the frontend folder, run the following command:
npm install react-bootstrap bootstrap react-icons
Then add the following import to the main.jsx file:
import 'bootstrap/dist/css/bootstrap.min.css';
Create Header
Let's create a basic header/navbar component. Create a new folder called components and inside that folder create a new file called Header.jsx.
import { Navbar, Nav, Container } from 'react-bootstrap';
import { FaSignInAlt, FaSignOutAlt } from 'react-icons/fa';

const Header = () => {
  return (
    <header>
      <Navbar bg='dark' variant='dark' expand='lg' collapseOnSelect>
        <Container>
          <Navbar.Brand href='/'>MERN App</Navbar.Brand>
          <Navbar.Toggle aria-controls='basic-navbar-nav' />
          <Navbar.Collapse id='basic-navbar-nav'>
            <Nav className='ms-auto'>
              <Nav.Link href='/login'>
                <FaSignInAlt /> Sign In
              </Nav.Link>
              <Nav.Link href='/login'>
                <FaSignOutAlt /> Sign Up
              </Nav.Link>
            </Nav>
          </Navbar.Collapse>
        </Container>
      </Navbar>
    </header>
  );
};

export default Header;
HomeScreen
Create a folder called screens and inside that folder create a new file called HomeScreen.jsx. For now, just add the following:
const HomeScreen = () => {
  return <div>HomeScreen</div>;
};
export default HomeScreen;
HomeScreen Hero
To make this look a little less horrible, let's add a hero section to the HomeScreen component. Create a new file in the components folder called Hero.jsx. Add the following code:
import { Container, Card, Button } from 'react-bootstrap';

const Hero = () => {
  return (
    <div className=' py-5'>
      <Container className='d-flex justify-content-center'>
        <Card className='p-5 d-flex flex-column align-items-center hero-card bg-light w-75'>
          <h1 className='text-center mb-4'>MERN Authentication</h1>
          <p className='text-center mb-4'>
            This is a boilerplate for MERN authentication that stores a JWT in
            an HTTP-Only cookie. It also uses Redux Toolkit and the React
            Bootstrap library
          </p>
          <div className='d-flex'>
            <Button variant='primary' href='/login' className='me-3'>
              Sign In
            </Button>
            <Button variant='secondary' href='/register'>
              Register
            </Button>
          </div>
        </Card>
      </Container>
    </div>
  );
};

export default Hero;
Then import it into the HomeScreen.jsx file and add it to the component:
import Hero from '../components/Hero';

const HomeScreen = () => {
  return (
    <>
      <Hero />
    </>
  );
};
Open the App.js file and add the following code:
import { Container } from 'react-bootstrap';
import Header from '../components/Header';
import HomeScreen from './screens/HomeScreen';

const App = () => {
  return (
    <>
      <Header />
      <Container className='my-2'>
        <HomeScreen />
      </Container>
    </>
  );
};

export default App;
You should now see the HomeScreen with the Hero section:

React Router
We need to be able to have multiple pages in our app. To do this, we will use React Router. From the frontend folder, run the following command:
npm install react-router-dom
In the main.jsx file if you're using Vite and index.js if you're using Create React App, add the following code:
import React from 'react';
import ReactDOM from 'react-dom/client';
import App from './App.jsx';
import {
  createBrowserRouter,
  createRoutesFromElements,
  Route,
  RouterProvider,
} from 'react-router-dom';
import './index.css';
import 'bootstrap/dist/css/bootstrap.min.css';
import HomeScreen from './screens/HomeScreen';

const router = createBrowserRouter(
  createRoutesFromElements(
    <Route path='/' element={<App />}>
      <Route index={true} path='/' element={<HomeScreen />} />
    </Route>
  )
);

ReactDOM.createRoot(document.getElementById('root')).render(
  <React.StrictMode>
    <RouterProvider router={router} />
  </React.StrictMode>
);
Here we are creating our routes and wrapping our app in the RouterProvider component. We also created the route for the HomeScreen component.
Now, we just need to add the <Outlet /> component to the App.jsx file. This will render the child routes of the parent route. So our App.jsx file should look like this:
import { Container } from 'react-bootstrap';
import { Outlet } from 'react-router-dom';
import Header from './components/Header';

const App = () => {
  return (
    <>
      <Header />
      <Container className='my-2'>
        <Outlet />
      </Container>
    </>
  );
};

export default App;
Using Link & LinkContainer
Right now, in our header, we have a link to the login and register pages using an anchor tag. This will cause a full page refresh when we click on the link. We want to use the Link component from React Router to prevent this.
Since we are using React Bootstrap, we can use the LinkContainer component from react-router-bootstrap to wrap our Link component. This will allow us to use the Link component as a React Bootstrap component.
From the frontend folder, run the following command:
npm install react-router-bootstrap
Now, change the Header.jsx file to the following:
import { Navbar, Nav, Container } from 'react-bootstrap';
import { LinkContainer } from 'react-router-bootstrap';
import { FaSignInAlt, FaSignOutAlt } from 'react-icons/fa';

const Header = () => {
  return (
    <header>
      <Navbar bg='dark' variant='dark' expand='lg' collapseOnSelect>
        <Container>
          <LinkContainer to='/'>
            <Navbar.Brand>MERN App</Navbar.Brand>
          </LinkContainer>
          <Navbar.Toggle aria-controls='basic-navbar-nav' />
          <Navbar.Collapse id='basic-navbar-nav'>
            <Nav className='ms-auto'>
              <LinkContainer to='/login'>
                <Nav.Link>
                  <FaSignInAlt /> Sign In
                </Nav.Link>
              </LinkContainer>
              <LinkContainer to='/register'>
                <Nav.Link>
                  <FaSignOutAlt /> Sign Up
                </Nav.Link>
              </LinkContainer>
            </Nav>
          </Navbar.Collapse>
        </Container>
      </Navbar>
    </header>
  );
};

export default Header;
Notice now we are wrapping the Navbar.Brand and Nav.Link components in the LinkContainer component. Also, we are using the to prop instead of the href prop.
I had to restart my server for some reason. So if you run into an issue, try that first.
FormContainer Component
Before we create our login and register forms, I want to create a simple wrapper component for these forms, since they will be in a more narrow container.
Create a new file in the components folder called FormContainer.jsx. Add the following code:
import { Container, Row, Col } from 'react-bootstrap';

const FormContainer = ({ children }) => {
  return (
    <Container>
      <Row className='justify-content-md-center mt-5'>
        <Col xs={12} md={6} className='card p-5'>
          {children}
        </Col>
      </Row>
    </Container>
  );
};

export default FormContainer;
This will allow us to wrap our forms in a container that is centered on the page and is only 6 columns wide on larger screens.
Login Screen
Let's go ahead and create the login screen. Create a new file in the screens folder called LoginScreen.jsx. Add the following code:
import { useState } from 'react';
import { Link } from 'react-router-dom';
import { Form, Button, Row, Col } from 'react-bootstrap';
import FormContainer from '../components/FormContainer';

const LoginScreen = () => {
  const [email, setEmail] = useState('');
  const [password, setPassword] = useState('');

  const submitHandler = async (e) => {
    e.preventDefault();
    console.log('submit');
  };

  return (
    <FormContainer>
      <h1>Sign In</h1>

      <Form onSubmit={submitHandler}>
        <Form.Group className='my-2' controlId='email'>
          <Form.Label>Email Address</Form.Label>
          <Form.Control
            type='email'
            placeholder='Enter email'
            value={email}
            onChange={(e) => setEmail(e.target.value)}
          ></Form.Control>
        </Form.Group>

        <Form.Group className='my-2' controlId='password'>
          <Form.Label>Password</Form.Label>
          <Form.Control
            type='password'
            placeholder='Enter password'
            value={password}
            onChange={(e) => setPassword(e.target.value)}
          ></Form.Control>
        </Form.Group>

        <Button type='submit' variant='primary' className='mt-3'>
          Sign In
        </Button>
      </Form>

      <Row className='py-3'>
        <Col>
          New Customer? <Link to={`/register`}>Register</Link>
        </Col>
      </Row>
    </FormContainer>
  );
};

export default LoginScreen;
This is strictly the UI. We have no functionality at all. I want to get both forms displaying before we add any functionality.
Add To Router
Open the main.jsx file and add the following route:
import LoginScreen from './screens/LoginScreen.jsx';

<Route path='/' element={<App />}>
  <Route index={true} path='/' element={<HomeScreen />} />
  <Route path='/login' element={<LoginScreen />} /> {/* Add this line */}
</Route>;
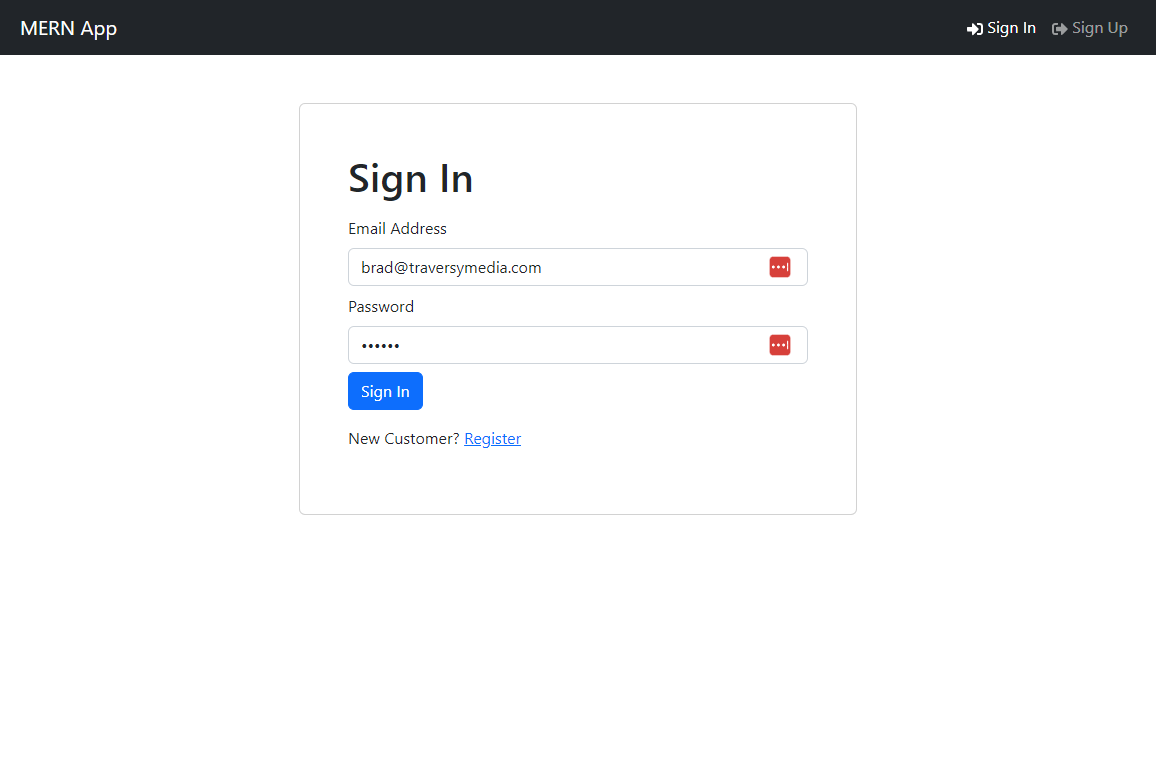
You should now see a basic login form:
Register Screen
Let's do the same with the register screen. Create the UI and add the route.
Create a new file in the screens folder called RegisterScreen.jsx. Add the following code:
import { useState } from 'react';
import { Link } from 'react-router-dom';
import { Form, Button, Row, Col } from 'react-bootstrap';
import FormContainer from '../components/FormContainer';

const RegisterScreen = () => {
  const [name, setName] = useState('');
  const [email, setEmail] = useState('');
  const [password, setPassword] = useState('');
  const [confirmPassword, setConfirmPassword] = useState('');

  const submitHandler = async (e) => {
    e.preventDefault();
    console.log('submit');
  };

  return (
    <FormContainer>
      <h1>Register</h1>
      <Form onSubmit={submitHandler}>
        <Form.Group className='my-2' controlId='name'>
          <Form.Label>Name</Form.Label>
          <Form.Control
            type='name'
            placeholder='Enter name'
            value={name}
            onChange={(e) => setName(e.target.value)}
          ></Form.Control>
        </Form.Group>

        <Form.Group className='my-2' controlId='email'>
          <Form.Label>Email Address</Form.Label>
          <Form.Control
            type='email'
            placeholder='Enter email'
            value={email}
            onChange={(e) => setEmail(e.target.value)}
          ></Form.Control>
        </Form.Group>

        <Form.Group className='my-2' controlId='password'>
          <Form.Label>Password</Form.Label>
          <Form.Control
            type='password'
            placeholder='Enter password'
            value={password}
            onChange={(e) => setPassword(e.target.value)}
          ></Form.Control>
        </Form.Group>
        <Form.Group className='my-2' controlId='confirmPassword'>
          <Form.Label>Confirm Password</Form.Label>
          <Form.Control
            type='password'
            placeholder='Confirm password'
            value={confirmPassword}
            onChange={(e) => setConfirmPassword(e.target.value)}
          ></Form.Control>
        </Form.Group>

        <Button type='submit' variant='primary' className='mt-3'>
          Register
        </Button>
      </Form>

      <Row className='py-3'>
        <Col>
          Already have an account? <Link to={`/login`}>Login</Link>
        </Col>
      </Row>
    </FormContainer>
  );
};

export default RegisterScreen;
Now add the route:
import RegisterScreen from './screens/RegisterScreen.jsx';

<Route path='/' element={<App />}>
  <Route index={true} path='/' element={<HomeScreen />} />
  <Route path='/login' element={<LoginScreen />}
  <Route path='/register' element={<RegisterScreen />} /> {/* Add this line */}
</Route>;
You should now see a basic register form:

Redux Toolkit
Now that we have our UI setup, we now need to deal with application state. We could send off a request from the login and register component, but I want a centralized place to handle all of our state and any requests that will change that state. This is where Redux comes in. Redux is a state management library that allows us to create a store that holds all of our state. We can then dispatch actions to change that state.
A reducer is a function that takes in the current state and an action and returns the new state. We can have multiple reducers that handle different parts of our state. For example, we could have a reducer that handles the user state and another reducer that handles the product state.
Redux Toolkit is a package that helps us create our store and reducers in a much easier way than using vanilla Redux.
Let's install Redux Toolkit as well as the React bindings for Redux. Make sure that you are in the frontend folder and run the following command:
cd frontend
npm install @reduxjs/toolkit react-redux
Store
A store is a place to hold all of our state. We can then dispatch actions to change that state. We can also subscribe to the store to get the current state.
Create a file in the frontend/src folder called store.js. Add the following code:
import { configureStore } from '@reduxjs/toolkit';

const store = configureStore({
  reducer: {},
  middleware: (getDefaultMiddleware) => getDefaultMiddleware(),
  devTools: true,
});

export default store;
We are using the configureStore function from Redux Toolkit to create our store. We are passing in an object with a reducer property. We will add our reducers to this object later. We are also passing in a middleware property. Middleware is a way to extend Redux with custom functionality. We are also enabling the Redux DevTools extension, which you should have installed, if you don't, get it from the following links:
- Chrome: https://chrome.google.com/webstore/detail/redux-devtools/lmhkpmbekcpmknklioeibfkpmmfibljd
- Firefox: https://addons.mozilla.org/en-US/firefox/addon/reduxdevtools/
Provider
In order for our application to work with the Redux store, we have to wrap it in our provider.
Open the main.jsx file and add the following code:
import store from './store';
import { Provider } from 'react-redux';
Then wrap the app with the provider:
ReactDOM.createRoot(document.getElementById('root')).render(
  <Provider store={store}>
    <React.StrictMode>
      <RouterProvider router={router} />
    </React.StrictMode>
  </Provider>
);
I hit another error here and I actually had to delete my frontend node_modules folder and run npm install again. I'm not sure why this happened, but it fixed the issue.
You will probably get a warning in the console that says you do not have a valid reducer, but that is fine at this point.
Auth Slice
In Redux Toolkit, we create reducers using something called a slice. A slice is a collection of reducer logic and actions for a single feature of our app. We will create a slice for our authentication that will only deal with the local storage of the user. We will have a separate API slice for actually making the requests to the endpoint.
Create a folder in the frontend/src folder called slices. Then create a file in that folder called authSlice.js. Add the following code:
import { createSlice } from '@reduxjs/toolkit';

const initialState = {
  userInfo: localStorage.getItem('userInfo')
    ? JSON.parse(localStorage.getItem('userInfo'))
    : null,
};

const authSlice = createSlice({
  name: 'auth',
  initialState,
  reducers: {
    setCredentials: (state, action) => {
      state.userInfo = action.payload;
      localStorage.setItem('userInfo', JSON.stringify(action.payload));
    },
    logout: (state, action) => {
      state.userInfo = null;
      localStorage.removeItem('userInfo');
    },
  },
});

export const { setCredentials, logout } = authSlice.actions;

export default authSlice.reducer;
Like I said, this only has to do with the local storage of the user. We have one reducer that sets the user info in local storage and another that removes it. Very simple.
To use a slice, we need to import it into the store and use it. Open the store.js file and add the following code:
import { configureStore } from '@reduxjs/toolkit';
import authReducer from './slices/AuthSlice';

const store = configureStore({
  reducer: {
    auth: authReducer,
  },
  middleware: (getDefaultMiddleware) => getDefaultMiddleware(),
  devTools: true,
});

export default store;
So just bring in authSlice and add it to the reducer object.
Now, open your devtools and go to the Redux tab. You should see your store with the auth slice:

The userinfo is currently empty, but after we authenticate with our backend, it will store the logged in user data. It will also be in local storage.
API Slice
In order to make async requests from our slice, we need to use something called createAsyncThunk. This can be a bit confusing but Redux handles this behind the scenes as long as we follow the correct conventions.
Create a file in the frontend/src/slices folder called apiSlice.js. Add the following code:
import { fetchBaseQuery, createApi } from '@reduxjs/toolkit/query/react';

const baseQuery = fetchBaseQuery({ baseUrl: '' });

export const apiSlice = createApi({
  baseQuery,
  tagTypes: ['User'],
  endpoints: (builder) => ({}),
});
We are using the createApi function from Redux Toolkit to create our API slice instead of createSlice, because it includes the middleware that we need to make requests to our server. We are passing in a baseQuery object that will be used to make our requests. We are also passing in an endpoints object that will hold all of our endpoints.
We need to hook this up to our store, so open the store.js file and add the following code:
import { configureStore } from '@reduxjs/toolkit';
import { apiSlice } from './slices/apiSlice';
import cartSliceReducer from './slices/cartSlice';
import authReducer from './slices/authSlice'; // add this line

const store = configureStore({
  reducer: {
    [apiSlice.reducerPath]: apiSlice.reducer,
    cart: cartSliceReducer,
    auth: authReducer, // add this line
  },
  middleware: (getDefaultMiddleware) =>
    getDefaultMiddleware().concat(apiSlice.middleware),
  devTools: true,
});

export default store;
We brought in the new API slice and added it to the reducer object. We also added the middleware to the getDefaultMiddleware function by using the concat method.
These few lines of code do so much for us behind the scenes. They allow us to easily create queries and mutations along with the loading and error state. Something we would have to manually take care of if we used vanilla Redux.
User API Slice
We want to work with our user data and we need to create some endpoints to work with the backend. We are going to keep that stuff in a separate file.
Create a file called usersApiSlice.js in the frontend/src/slices folder. Add the following code:
import { apiSlice } from './apiSlice';
const USERS_URL = '/api/users';

export const userApiSlice = apiSlice.injectEndpoints({
  endpoints: (builder) => ({
    login: builder.mutation({
      query: (data) => ({
        url: `${USERS_URL}/auth`,
        method: 'POST',
        body: data,
      }),
    }),
  }),
});

export const { useLoginMutation } = userApiSlice;
We bring in the apiSlice and then use the injectEndpoints method to create our endpoints. We are only creating one endpoint for now, but we will add more later. We are using the mutation method to create a login endpoint. We are passing in a query object that contains the url, method, and body of the request.
As you can see, when we need to interact with our backend, it's as simple as creating an endpoint and passing in the data. We don't have to worry about the loading and error state, because Redux Toolkit handles that for us.
We also do not need to add this slice to the store because it is already included in the apiSlice that we added to the store. You can think of this as a sub-slice to the API slice.
Using the Login Endpoint
Now we want to hook this mutation up to our login form, so open up the frontend/src/components/LoginForm.js file and add the following code:
import { useState, useEffect } from 'react';
import { Link, useNavigate } from 'react-router-dom';
import { Form, Button, Row, Col } from 'react-bootstrap';
import FormContainer from '../components/FormContainer';
import { useDispatch, useSelector } from 'react-redux';
import { useLoginMutation } from '../slices/usersApiSlice';
import { setCredentials } from '../slices/authSlice';

const LoginScreen = () => {
  const [email, setEmail] = useState('');
  const [password, setPassword] = useState('');

  const dispatch = useDispatch();
  const navigate = useNavigate();

  const [login, { isLoading }] = useLoginMutation();

  const { userInfo } = useSelector((state) => state.auth);

  useEffect(() => {
    if (userInfo) {
      navigate('/');
    }
  }, [navigate, userInfo]);

  const submitHandler = async (e) => {
    e.preventDefault();
    try {
      const res = await login({ email, password }).unwrap();
      dispatch(setCredentials({ ...res }));
      navigate('/');
    } catch (err) {
      console.log(err?.data?.message || err.error);
    }
  };

  return (
    <FormContainer>
      <h1>Sign In</h1>

      <Form onSubmit={submitHandler}>
        <Form.Group className='my-2' controlId='email'>
          <Form.Label>Email Address</Form.Label>
          <Form.Control
            type='email'
            placeholder='Enter email'
            value={email}
            onChange={(e) => setEmail(e.target.value)}
          ></Form.Control>
        </Form.Group>

        <Form.Group className='my-2' controlId='password'>
          <Form.Label>Password</Form.Label>
          <Form.Control
            type='password'
            placeholder='Enter password'
            value={password}
            onChange={(e) => setPassword(e.target.value)}
          ></Form.Control>
        </Form.Group>

        <Button
          disabled={isLoading}
          type='submit'
          variant='primary'
          className='mt-3'
        >
          Sign In
        </Button>
      </Form>

      {isLoading && <p>Loading...</p>}

      <Row className='py-3'>
        <Col>
          New Customer? <Link to='/register'>Register</Link>
        </Col>
      </Row>
    </FormContainer>
  );
};

export default LoginScreen;
We are doing quite a bit here. First, we are bringing in useSelector and useDispatch from react-redux. This allows us to dispatch actions and select data from the store. We are also bringing in the useLoginMutation hook that we created in the usersApiSlice.js file. We are also bringing in the setCredentials action from the authSlice.js file. We will set the credentials after a successful login.
Then we are getting the login function and the isLoading state from the useLoginMutation hook. We are also getting the userInfo state from the authSlice.js file.
We are using the useEffect hook to redirect the user to the home page if they are already logged in. We are also using the useNavigate hook from react-router-dom to redirect the user after a successful login.
Try and submit with either empty fields or the wrong login creds. You should see a console log with an error. I want to use the React Toastify package to show errors. I also want to show a loading spinner when the login button is clicked. Let's handle that before we test with the correct login creds.
React Toastify
We are going to use the React Toastify package to show errors and success messages. This is a great package that is easy to use and looks great. Let's install it now. Make sure that you are in the frontend folder and run the following command:
npm i react-toastify
Now open up the frontend/src/App.js file and replace with the following code:
import { Container } from 'react-bootstrap';
import { Outlet } from 'react-router-dom';
import { ToastContainer } from 'react-toastify';
import 'react-toastify/dist/ReactToastify.css';
import Header from './components/Header';

const App = () => {
  return (
    <>
      <Header />
      <ToastContainer />
      <Container className='my-2'>
        <Outlet />
      </Container>
    </>
  );
};

export default App;
Now in the frontend/src/components/LoginForm.js file, add the following code:
import { toast } from 'react-toastify';
Replace the console.log in the catch block with the following code:
toast.error(err?.data?.message || err.error);
Now, when you try and submit with the wrong login creds, you should see a nice error message. You can also use the toast.success method to show a success message.
Loading Spinner
Let's create a file in the frontend/src/components folder called Loader.jsx and add the following code:
import { Spinner } from 'react-bootstrap';

const Loader = () => {
  return (
    <Spinner
      animation='border'
      role='status'
      style={{
        width: '100px',
        height: '100px',
        margin: 'auto',
        display: 'block',
      }}
    ></Spinner>
  );
};

export default Loader;
We are using the Spinner component from react-bootstrap to create a loading spinner. We are also using some inline styles to center the spinner.
Now bring it into the LoginScreen component and replace the paragraph tag:
import Loader from '../components/Loader';

{
  isLoading && <Loader />;
}
Now when you click the login button, you should see a loading spinner for a few milliseconds.
Setting Credentials
Now, let's try logging in with a user with the correct email and password.
You should be redirected to the home screen and if you open your Redux dev tools, you should see the auth state with the userInfo object.

This happens because once we get a successful login, we call the setCredentials action and pass in the userInfo object. This will set the userInfo object in the auth state. It is also saved in local storage.
What is really cool is now the cookie is set with the JWT. If you open up the dev tools and go to the Application tab, you should see the cookie.

This is an HTTP-Only cookie and is a safer place for the JWT and will be sent with every request.
If you try and go to the sign in page, you will be redirected to the homepage.
Dynamic Header Links
I want to make it so that if we are logged in, we see a dropdown with the user's name and a link to their profile and a logout link.
Open up the frontend/src/components/Header.js file and replace with the following code:
import { Navbar, Nav, Container, NavDropdown, Badge } from 'react-bootstrap';
import { FaSignInAlt, FaSignOutAlt } from 'react-icons/fa';
import { LinkContainer } from 'react-router-bootstrap';
import { useSelector, useDispatch } from 'react-redux';
import { useNavigate } from 'react-router-dom';

const Header = () => {
  const { userInfo } = useSelector((state) => state.auth);

  return (
    <header>
      <Navbar bg='dark' variant='dark' expand='lg' collapseOnSelect>
        <Container>
          <LinkContainer to='/'>
            <Navbar.Brand>MERN App</Navbar.Brand>
          </LinkContainer>
          <Navbar.Toggle aria-controls='basic-navbar-nav' />
          <Navbar.Collapse id='basic-navbar-nav'>
            <Nav className='ms-auto'>
              {userInfo ? (
                <>
                  <NavDropdown title={userInfo.name} id='username'>
                    <LinkContainer to='/profile'>
                      <NavDropdown.Item>Profile</NavDropdown.Item>
                    </LinkContainer>
                    <NavDropdown.Item>Logout</NavDropdown.Item>
                  </NavDropdown>
                </>
              ) : (
                <>
                  <LinkContainer to='/login'>
                    <Nav.Link>
                      <FaSignInAlt /> Sign In
                    </Nav.Link>
                  </LinkContainer>
                  <LinkContainer to='/register'>
                    <Nav.Link>
                      <FaSignOutAlt /> Sign Up
                    </Nav.Link>
                  </LinkContainer>
                </>
              )}
            </Nav>
          </Navbar.Collapse>
        </Container>
      </Navbar>
    </header>
  );
};

export default Header;
We are bringing in the userInfo from the auth state. This is essentially the data that we have in local storage. We are also bringing in the useDispatch hook from react-redux and the useNavigate hook from react-router-dom. We will need these soon.
Logout
Let's make the logout function next. We already have the backend functionality.
Open the usersApiSlice.js file and add the following function under the login function:
  logout: builder.mutation({
      query: () => ({
        url: `${USERS_URL}/logout`,
        method: 'POST',
      }),
    }),
Don't forget to export:
export const { useLoginMutation, useLogoutMutation } = userApiSlice;
This is very simple, we are just making a POST request to the /logout endpoint. Remember, it kills the cookie on the server. We also need to kill the local storage and the Redux state. That function was already added to the authSlice.js file.
Now open up the frontend/src/components/Header.js file and add the following code:
import { useLogoutMutation } from '../slices/usersApiSlice';
import { logout } from '../slices/authSlice';
Add the following code right under where we get the userInfo:
const dispatch = useDispatch();
const navigate = useNavigate();

const [logoutApiCall] = useLogoutMutation();

const logoutHandler = async () => {
  try {
    await logoutApiCall().unwrap();
    dispatch(logout());
    navigate('/login');
  } catch (err) {
    console.error(err);
  }
};
Here we are bringing in the logout mutation from the usersApiSlice and the logout action from the authSlice. We are also inititalizing the useNavigate and useDispatch hooks.
We get the logoutApiCall function, which we could have called anything and then added the logout handler to call both the logout mutation and the logout action. We also navigate to the login page.
Now, just add the onClick handler to the logout link:
<NavDropdown.Item onClick={logoutHandler}>Logout</NavDropdown.Item>
Now, when you click the logout link, you should be redirected to the login page and the cookie should be removed. The user should also be removed from local storage and the Redux state.
Register
Before we get to the profile page, let's make the register page function.
Let's start by adding the mutation to the state. Open the usersApiSlice.js file and add the following code under the logout function:
  register: builder.mutation({
    query: (data) => ({
      url: `${USERS_URL}`,
      method: 'POST',
      body: data,
    }),
   }),
Export it:
export const { useLoginMutation, useLogoutMutation, useRegisterMutation } =
  userApiSlice;
Now open up the frontend/src/screens/RegisterScreen.js file and add the following code:
import { useState, useEffect } from 'react';
import { Form, Button, Row, Col } from 'react-bootstrap';
import FormContainer from '../components/FormContainer';
import { Link, useLocation, useNavigate } from 'react-router-dom';
import { useDispatch, useSelector } from 'react-redux';
import { useRegisterMutation } from '../slices/usersApiSlice';
import { setCredentials } from '../slices/authSlice';
import { toast } from 'react-toastify';
Add this right under all of the useState hooks:
const dispatch = useDispatch();
const navigate = useNavigate();

const [register, { isLoading }] = useRegisterMutation();

const { userInfo } = useSelector((state) => state.auth);

useEffect(() => {
  if (userInfo) {
    navigate('/');
  }
}, [navigate, userInfo]);
Add the following code to the submitHandler function:
const submitHandler = async (e) => {
  e.preventDefault();

  if (password !== confirmPassword) {
    toast.error('Passwords do not match');
  } else {
    try {
      const res = await register({ name, email, password }).unwrap();
      dispatch(setCredentials({ ...res }));
      navigate('/');
    } catch (err) {
      toast.error(err?.data?.message || err.error);
    }
  }
};
We are doing the same thing as with the login except we are using the register mutation instead of the login mutation. We are also using the setCredentials action instead of the login action.
Add the loading check under the button:
{
  isLoading && <Loader />;
}
Go ahead and try to register a new user. It should log that user in as well. You can also logout.
Profile
Now we have full authentication working. Let's make the profile page.
Create a new screen called ProfileScreen.js in the frontend/src/screens folder. Add the following code:
import { useState, useEffect } from 'react';
import { Link, useNavigate } from 'react-router-dom';
import { Form, Button } from 'react-bootstrap';
import { useDispatch, useSelector } from 'react-redux';
import FormContainer from '../components/FormContainer';
import { toast } from 'react-toastify';
import Loader from '../components/Loader';

const ProfileScreen = () => {
  const [email, setEmail] = useState('');
  const [name, setName] = useState('');
  const [password, setPassword] = useState('');
  const [confirmPassword, setConfirmPassword] = useState('');

  const submitHandler = async (e) => {
    e.preventDefault();
    console.log('submit');
  };

  return (
    <FormContainer>
      <h1>Update Profile</h1>

      <Form onSubmit={submitHandler}>
        <Form.Group className='my-2' controlId='name'>
          <Form.Label>Name</Form.Label>
          <Form.Control
            type='name'
            placeholder='Enter name'
            value={name}
            onChange={(e) => setName(e.target.value)}
          ></Form.Control>
        </Form.Group>
        <Form.Group className='my-2' controlId='email'>
          <Form.Label>Email Address</Form.Label>
          <Form.Control
            type='email'
            placeholder='Enter email'
            value={email}
            onChange={(e) => setEmail(e.target.value)}
          ></Form.Control>
        </Form.Group>
        <Form.Group className='my-2' controlId='password'>
          <Form.Label>Password</Form.Label>
          <Form.Control
            type='password'
            placeholder='Enter password'
            value={password}
            onChange={(e) => setPassword(e.target.value)}
          ></Form.Control>
        </Form.Group>

        <Form.Group className='my-2' controlId='confirmPassword'>
          <Form.Label>Confirm Password</Form.Label>
          <Form.Control
            type='password'
            placeholder='Confirm password'
            value={confirmPassword}
            onChange={(e) => setConfirmPassword(e.target.value)}
          ></Form.Control>
        </Form.Group>

        <Button type='submit' variant='primary' className='mt-3'>
          Update
        </Button>
      </Form>
    </FormContainer>
  );
};

export default ProfileScreen;
This is just a simple form with inputs for the user data. We will add the user data soon, but let's add the route first.
Open the main.jsx file and add the following route:
import ProfileScreen from './screens/ProfileScreen.jsx';

<Route path='/' element={<App />}>
  <Route index={true} path='/' element={<HomeScreen />} />
  <Route path='/login' element={<LoginScreen />} />
  <Route path='/register' element={<RegisterScreen />} />
  <Route path='/profile' element={<ProfileScreen />} /> {/* Add this line */}
</Route>;
Now if you login, you should be able to go to the profile menu item and see the form.
Private Route
The issue that we have right now is that even if you logout and manually go to the profile page, you can still see the form. We need to make this a private route so that only logged in users can see it.
We can do this by creating a private route component. Create a file called PrivateRoute.jsx in the frontend/src/components folder. Add the following code:
import { Navigate, Outlet } from 'react-router-dom';
import { useSelector } from 'react-redux';

const PrivateRoute = () => {
  const { userInfo } = useSelector((state) => state.auth);
  return userInfo ? <Outlet /> : <Navigate to='/login' replace />;
};
export default PrivateRoute;
All we are doing here is checking if the user is logged in. If they are, we render the Outlet component, which will render the child components. If they are not logged in, we redirect them to the login page.
Now we have to use this in the main.jsx file. Add the following import:
import PrivateRoute from './components/PrivateRoute.jsx';
Then replace the current <Route> in the 'createRoutesFromElements' function with the following code:
const router = createBrowserRouter(
  createRoutesFromElements(
    <Route path='/' element={<App />}>
      <Route index={true} path='/' element={<HomeScreen />} />
      <Route path='/login' element={<LoginScreen />} />
      <Route path='/register' element={<RegisterScreen />} />
      <Route path='' element={<PrivateRoute />}>
        <Route path='/profile' element={<ProfileScreen />} />
      </Route>
    </Route>
  )
);
We are wrapping the PrivateRoute component around the ProfileScreen component. Now if you logout and try to go to the profile page, you will be redirected to the login page.
Fill Form
We have the user data in local storage, so we can fill the form with that. Open the frontend/src/screens/ProfileScreen.js file and add the following code:
const { userInfo } = useSelector((state) => state.auth);

useEffect(() => {
  setName(userInfo.name);
  setEmail(userInfo.email);
}, [userInfo.email, userInfo.name]);
We are getting the user from storage and then using the useEffect hook to set the name and email state when the component mounts.
Update User
The last major thing that we need to do is be able to update our user data.
We already have the endpoint, so let's add the mutation to the usersApiSlice.js file:
  updateUser: builder.mutation({
    query: (data) => ({
      url: `${USERS_URL}/profile`,
      method: 'PUT',
      body: data,
    }),
  }),
Export it:
export const {
  useLoginMutation,
  useLogoutMutation,
  useRegisterMutation,
  useUpdateUserMutation,
} = userApiSlice;
Now open the frontend/src/screens/ProfileScreen.js file and add the following code:
import { useUpdateUserMutation } from '../slices/usersApiSlice';
import { setCredentials } from '../slices/authSlice';
We ned to bring in the mutation that we just created along with the setCredentials action because if we change the email or name, the credentials in state have to be updated.
Initialize dispatch and the function to update along with the loading state:
const dispatch = useDispatch();

const [updateProfile, { isLoading }] = useUpdateUserMutation();
Finally, add the following code to the submitHandler function:
const submitHandler = async (e) => {
  e.preventDefault();
  if (password !== confirmPassword) {
    toast.error('Passwords do not match');
  } else {
    try {
      const res = await updateProfile({
        _id: userInfo._id,
        name,
        email,
        password,
      }).unwrap();
      dispatch(setCredentials({ ...res }));
      toast.success('Profile updated successfully');
    } catch (err) {
      toast.error(err?.data?.message || err.error);
    }
  }
};
We check the confirm password, then hit the backend endpoint to update the data, then set the credentials in state and show a success message.
Go ahead and try and update the name.
If you update the email or password, be sure to use the new email and password to login.
Prepare For Production
We are almost done. We just need to prepare our app for production. We need to build the frontend and then serve the static files from the backend.
Open the frontend folder and run the following command:
npm run build
This will create a folder in the frontend folder. If you used Vite, the folder will be called dist and if you used CRA, it will be called build. This is what we will serve from the backend.
Open the backend/server.js file and add the following code:
import path from 'path';
Replace this line of code:
app.get('/', (req, res) => {
  res.send('API is running...');
});
With this:
if (process.env.NODE_ENV === 'production') {
  const __dirname = path.resolve();
  app.use(express.static(path.join(__dirname, '/frontend/dist')));

  app.get('*', (req, res) =>
    res.sendFile(path.resolve(__dirname, 'frontend', 'dist', 'index.html'))
  );
} else {
  app.get('/', (req, res) => {
    res.send('API is running....');
  });
}
What this will do is serve the static files from the frontend/dist folder and then serve the index.html file for any other route. The API routes will still work. Be sure if you used CRA to replace frontend/dist with frontend/build.
You can test this by setting your NODE_ENV variable in the .env file to production and then running the server with npm start and open the browser to localhost:5000. You should see the React app. This is your production build.
That's it! We now have a fully functioning authentication system with MERN and Redux Toolkit. You can use this as a starting point for your own projects.
Deploy To Akamai/Linode
Like I said in the beginning of part 1, Linode has always been my go-to for projects where I want complete control of my server.
Here is a link to get you $100 credit: https://linode.com/traversy
I have a GitHub gist that you can find here. That will explain how to deploy to linode and all of the setup steps including creating your SSH keys (optional), getting the files on the server, setting up PM2, NGINX and more.
I hope you enjoyed this MERN tutorial. I know it was very long, so if you finished it, congrats!
Stay connected with news and updates!
Join our mailing list to receive the latest news and updates from our team.
Don't worry, your information will not be shared.
We hate SPAM. We will never sell your information, for any reason.
