Product Filtering UI With Vanilla JS & Tailwind CSS
Feb 26, 2024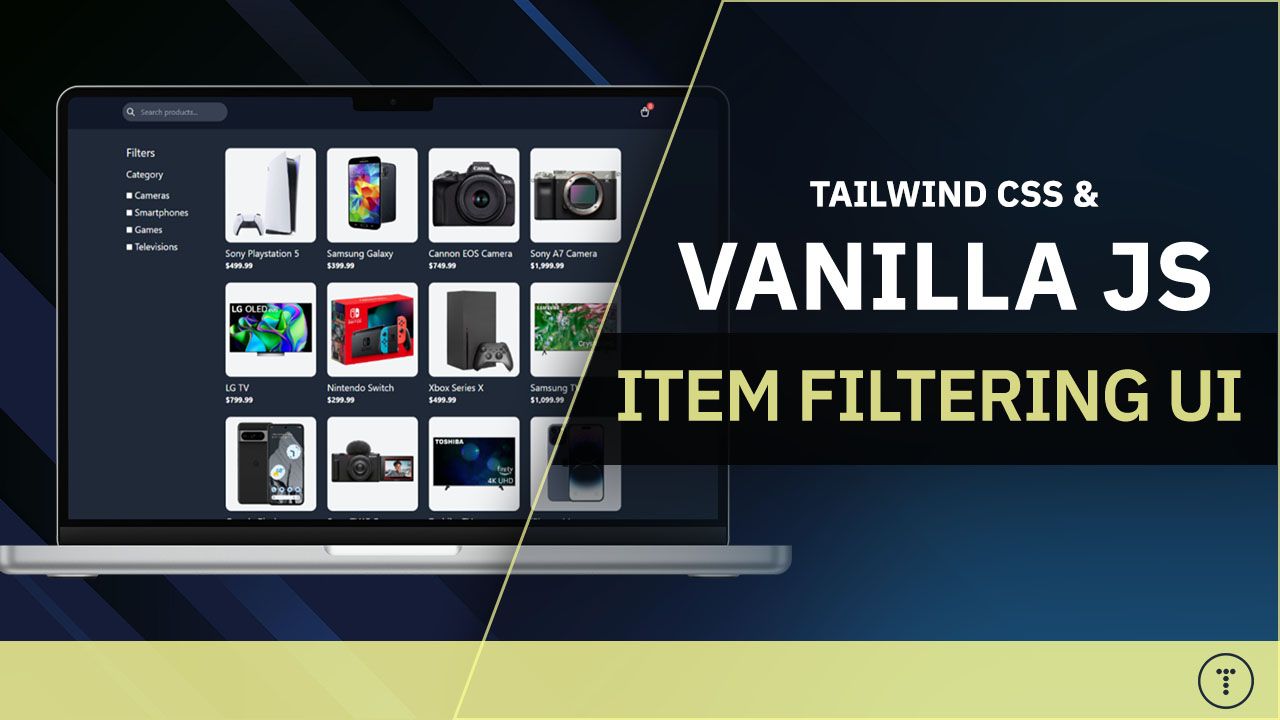
It's been a while since I did any vanilla JavaScript projects and I know some of the more intermediate and advanced developers may not be into this, but I know the people in the beginner range appreciate this stuff and honestly I like doing these types of projects.
This project is fairly simple but will get you more familiar with the DOM (Document Object Model) as we will be dynamically updating the page without having to refresh. We'll be dynamically changing CSS values through JavaScript. We'll also be working with high order array methods like forEach, map and filter. If you guys would like me to re-create this project in React, Vue or Svelte or even something else, let me know.
This project was actually just added to my 20 Vanilla JavaScript Projects course. I will have the repo link below, however I have changed some of the naming conventions. The exact code from this tutorial can be found in this Codepen.
So let's go over what we'll be building. It's an interface for an online store product section. We will be creating it from scratch using Tailwind CSS, however if you're not interested in writing the HTML, I'll have timestamps so you can go right to the JavaScript.
Once we create the interface, we're going to first add the ability to add and remove products to and from the cart, which will increment and decrement this number here. You can take that further if you want and have an actual cart with local storage, but that's not the main part of the project. The main part is the filtering. So we want to be able to check these categories on the side and only show products from the selected categories. We also want to be able to search for products with the search box. We also want to do this in a way where if categories are selected, then whatever we add in the searchbox should only apply to products in those categories.
Images and products
You will need the images for this project. I'm including the final code for the project below. You can get the images from the Github Repo or the demo.
Project Demo: https://codepen.io/bradtraversy/pen/oNVKXBo
Github Repo (Some naming conventions are different) https://github.com/bradtraversy/vanillawebprojects
The Files
Let's create the files. All that we need is an index.html, script.js and a folder named images. You can get the images from the link above.
The HTML
Let's add the HTML. I will be hardcoding the products and their info, however, when we get into the JavaScript, we will remove all of the hardcoded HTML because it will be added daynamically through the JS.
Let's start with the main html, head, body tags and include the Tailwind CDN as well as a link to the script.js file.
<!DOCTYPE html>
<html lang="en">
  <head>
    <meta charset="UTF-8" />
    <meta name="viewport" content="width=device-width, initial-scale=1.0" />
    <script src="https://cdn.tailwindcss.com"> </script>
    <title>Tech Store</title>
  </head>
  <body class="bg-gray-800 text-white">
    <script src="/script.js"> </script>
  </body>
</html>
We added a background and text color on to the body.
Navbar
It's not really a navbar because there is no navigation, but we will add a search input and the cart with the number of items:
<nav class="bg-gray-900 p-4 mb-6">
  <div
    class="container max-w-6xl mx-auto flex flex-col sm:flex-row gap-8 items-center"
  >
    <!-- Search area -->
    <div class="relative w-full">
      <input
        type="text"
        id="search"
        class="bg-gray-700 rounded-full p-2 pl-10 transition focus:w-full"
        placeholder="Search products..."
      />
      <svg
        class="absolute left-2 top-1/2 -translate-y-1/2"
        xmlns="http://www.w3.org/2000/svg"
        width="20"
        height="20"
        viewBox="0 0 24 24"
        stroke-width="2"
        stroke="currentColor"
        fill="none"
        stroke-linecap="round"
        stroke-linejoin="round"
      >
        <path stroke="none" d="M0 0h24v24H0z" fill="none" />
        <path d="M10 10m-7 0a7 7 0 1 0 14 0a7 7 0 1 0 -14 0" />
        <path d="M21 21l-6 -6" />
      </svg>
    </div>

    <!-- Cart icon -->
    <span class="relative text-center">
      <svg
        xmlns="http://www.w3.org/2000/svg"
        width="24"
        #
        height="24"
        viewBox="0 0 24 24"
        stroke-width="2"
        stroke="currentColor"
        fill="none"
        stroke-linecap="round"
        stroke-linejoin="round"
      >
        <path stroke="none" d="M0 0h24v24H0z" fill="none" />
        <path
          d="M6.331 8h11.339a2 2 0 0 1 1.977 2.304l-1.255 8.152a3 3 0 0 1 -2.966 2.544h-6.852a3 3 0 0 1 -2.965 -2.544l-1.255 -8.152a2 2 0 0 1 1.977 -2.304z"
        />
        <path d="M9 11v-5a3 3 0 0 1 6 0v5" />
      </svg>
      <small
        id="cart-count"
        class="bg-red-500 text-xs text-white w-4 h-4 absolute -top-2 -right-2 rounded-full"
        >0</small
      >
    </span>
  </div>
</nav>
We also included some SVG icons for the search and the cart.
Products & Categories
Under the <nav>, let's add a <main> the categories with checkboxes and the products wrapper:
<main class="flex flex-col md:flex-row container mx-auto max-w-6xl">
  <div class="space-y-4 p-2 w-full md:max-w-[10rem]">
    <h2 class="text-2xl">Filters</h2>
    <h3 class="text-xl mb-2">Category</h3>
    <div id="filters-container" class="text-xl space-y-2">
      <div>
        <input type="checkbox" class="check" id="cameras" />
        <label for="cameras">Cameras</label>
      </div>
      <div>
        <input type="checkbox" class="check" id="smartphones" />
        <label for="smartphones">Smartphones</label>
      </div>
      <div>
        <input type="checkbox" class="check" id="games" />
        <label for="games">Games</label>
      </div>
      <div>
        <input type="checkbox" class="check" id="televisions" />
        <label for="televisions">Televisions</label>
      </div>
    </div>
  </div>

  <!-- Products wrapper -->
  <div
    id="products-wrapper"
    class="w-full max-w-4xl mx-auto grid grid-cols-2 sm:grid-cols-3 xl:grid-cols-4 gap-6 place-content-center p-4"
  ></div>
</main>
The wrapper is empty, which is what we want because the actual products will be added from the JavaScript. However, let's put a few hardcoded products in there for now:
<!-- Products wrapper -->
<div
  id="products-wrapper"
  class="w-full max-w-4xl mx-auto grid grid-cols-2 sm:grid-cols-3 xl:grid-cols-4 gap-6 place-content-center p-4"
>
  <div class="item space-y-2">
    <div
      class="bg-gray-100 flex justify-center relative overflow-hidden group cursor-pointer border rounded-xl"
    >
      <img
        src="/images/playstation_5.png"
        alt=""
        class="w-full h-full object-cover"
      />
      <button
        class="status bg-black text-white absolute bottom-0 left-0 right-0 text-center py-2 translate-y-full transition group-hover:translate-y-0"
      >
        Add To Cart
      </button>
    </div>
    <p class="text-xl">Playstation 5</p>
    <strong>$399</strong>
  </div>

  <div class="item space-y-2">
    <div
      class="bg-gray-100 flex justify-center relative overflow-hidden group cursor-pointer border rounded-xl"
    >
      <img
        src="/images/samsung_galaxy.png"
        alt=""
        class="w-full h-full object-cover"
      />
      <button
        class="status bg-black text-white absolute bottom-0 left-0 right-0 text-center py-2 translate-y-full transition group-hover:translate-y-0"
      >
        Add To Cart
      </button>
    </div>
    <p class="text-xl">Samsung Galaxy</p>
    <strong>$399</strong>
  </div>

  <div class="item space-y-2">
    <div
      class="bg-gray-100 flex justify-center relative overflow-hidden group cursor-pointer border rounded-xl"
    >
      <img
        src="/images/playstation_5.png"
        alt=""
        class="w-full h-full object-cover"
      />
      <span
        class="status bg-black text-white absolute bottom-0 left-0 right-0 text-center py-2 translate-y-full transition group-hover:translate-y-0"
        >Add To Cart</span
      >
    </div>
    <p class="text-xl">Playstation 5</p>
    <strong>$399</strong>
  </div>

  <div class="item space-y-2">
    <div
      class="bg-gray-100 flex justify-center relative overflow-hidden group cursor-pointer border rounded-xl"
    >
      <img
        src="/images/cannon_eos_camera.png"
        alt=""
        class="w-full h-full object-cover"
      />
      <button
        class="status bg-black text-white absolute bottom-0 left-0 right-0 text-center py-2 translate-y-full transition group-hover:translate-y-0"
      >
        Add To Cart
      </button>
    </div>
    <p class="text-xl">Cannon EOS Camera</p>
    <strong>$749</strong>
  </div>
</div>
That's it for the HTML. Now we can start on the JavaScript.
The Data
In a real applicatiion, this data would most likely come from an API that interacts with a database, but we're just going to have it hardcoded in an array. Your script.js file should have this products array:
const products = [
  {
    name: 'Sony Playstation 5',
    url: 'images/playstation_5.png',
    category: 'games',
    price: 499.99,
  },
  {
    name: 'Samsung Galaxy',
    url: 'images/samsung_galaxy.png',
    category: 'smartphones',
    price: 399.99,
  },
  {
    name: 'Cannon EOS Camera',
    url: 'images/cannon_eos_camera.png',
    category: 'cameras',
    price: 749.99,
  },
  {
    name: 'Sony A7 Camera',
    url: 'images/sony_a7_camera.png',
    category: 'cameras',
    price: 1999.99,
  },
  {
    name: 'LG TV',
    url: 'images/lg_tv.png',
    category: 'televisions',
    price: 799.99,
  },
  {
    name: 'Nintendo Switch',
    url: 'images/nintendo_switch.png',
    category: 'games',
    price: 299.99,
  },
  {
    name: 'Xbox Series X',
    url: 'images/xbox_series_x.png',
    category: 'games',
    price: 499.99,
  },
  {
    name: 'Samsung TV',
    url: 'images/samsung_tv.png',
    category: 'televisions',
    price: 1099.99,
  },
  {
    name: 'Google Pixel',
    url: 'images/google_pixel.png',
    category: 'smartphones',
    price: 499.99,
  },
  {
    name: 'Sony ZV1F Camera',
    url: 'images/sony_zv1f_camera.png',
    category: 'cameras',
    price: 799.99,
  },
  {
    name: 'Toshiba TV',
    url: 'images/toshiba_tv.png',
    category: 'televisions',
    price: 499.99,
  },
  {
    name: 'iPhone 14',
    url: 'images/iphone_14.png',
    category: 'smartphones',
    price: 999.99,
  },
];
Now we want to display each of these products on the page via JavaScript.
Selecting the DOM Elements
Lets select the items from the DOM that we need:
// Get DOM elements
const productsWrapper = document.getElementById('products-wrapper');
const checkboxes = document.querySelectorAll('.check');
const filtersContainer = document.getElementById('filters-container');
const searchInput = document.getElementById('search');
const cartCount = document.getElementById('cart-count');
We will also intitialze the cart item count and the array of product elements. When I say elements, I mean the actual HTML output for each product:
// Initialize cart item count
let cartItemCount = 0;

// Initialize products
const productElements = [];
Now we need to loop over the products and create a new product element for each one and push it on to the productElements array:
// Loop over the products and create the product elements
products.forEach((product) => {
  const productElement = document.createElement('div');

  productElement.className = 'item space-y-2';

  productElement.innerHTML = `<div
  class="bg-gray-100 flex justify-center relative overflow-hidden group cursor-pointer border rounded-xl"
>
  <img
    src="${product.url}"
    alt="${product.name}"
    class="w-full h-full object-cover"
  />
  <button
    class="status bg-black text-white absolute bottom-0 left-0 right-0 text-center py-2 translate-y-full transition group-hover:translate-y-0"
    >Add To Cart</
  >
</div>
<p class="text-xl">${product.name}</p>
<strong>$${product.price.toLocaleString()}</strong>`;

  productElements.push(productElement);
  productsWrapper.appendChild(productElement);
});
We first create the product element by calling the createProductElement method. We then add a class to the product element and set the innerHTML to the product image, name and price. We then push the product element on to the productElements array and append it to the productsWrapper.
You should now see all of the products on the page.
Function Refactor
This is a bit messy. So let's refactor the code and create a function for creating the product element:
// Create product element
function createProductElement(product) {
  const productElement = document.createElement('div');

  productElement.className = 'item space-y-2';

  productElement.innerHTML = `<div
  class="bg-gray-100 flex justify-center relative overflow-hidden group cursor-pointer border rounded-xl"
>
  <img
    src="${product.url}"
    alt="${product.name}"
    class="w-full h-full object-cover"
  />
  <button
    class="status bg-black text-white absolute bottom-0 left-0 right-0 text-center py-2 translate-y-full transition group-hover:translate-y-0"
    >Add To Cart</button
  >
</div>
<p class="text-xl">${product.name}</p>
<strong>$${product.price.toLocaleString()}</strong>`;

  return productElement;
}
Now we have a function that we can call to create the product element. This makes the code a bit cleaner and easier to read. Let's use it within the loop:
// Loop over the products and create the product elements
products.forEach((product) => {
  const productElement = createProductElement(product);
  productElements.push(productElement);
  productsWrapper.appendChild(productElement);
});
Add & Remove From Cart
Let's add the ability to add and remove products from the cart. We will do this by adding an event listener and a new function.
In the createProductElement function, add the following line right above the return statement:
productElement.querySelector('.status').addEventListener('click', updateCart);
This will add an event listener to the button that will call the updateCart function when clicked.
Now let's create the updateCart function:
// Toggle add/remove from cart
function updateCart(e) {
  const statusEl = e.target;

  if (statusEl.classList.contains('added')) {
    // Remove from cart
    statusEl.classList.remove('added');
    statusEl.innerText = 'Add To Cart';
    statusEl.classList.remove('bg-red-600');
    statusEl.classList.add('bg-gray-800');

    cartItemCount--;
  } else {
    // Add to cart
    statusEl.classList.add('added');
    statusEl.innerText = 'Remove From Cart';
    statusEl.classList.remove('bg-gray-800');
    statusEl.classList.add('bg-red-600');

    cartItemCount++;
  }

  // Update cart item count
  cartCount.innerText = cartItemCount.toString();
}
This function will toggle the class of the button and update the cart item count.
Filtering
Now let's add the ability to filter the products by category. We will do this by adding an event listener to the checkboxes and a new function.
Add this code under the forEach loop:
// Add filter event listeners
filtersContainer.addEventListener('change', filterProducts);
searchInput.addEventListener('input', filterProducts);
We will have both the search box and the checkboxes call the same function. This function will filter the products based on the search input and the checked categories.
Now let's create the filterProducts function:
// Filter products by search or checkbox
function filterProducts( ) {
  // Get search term
  const searchTerm = searchInput.value.trim().toLowerCase();
  // Get checked categories
  const checkedCategories = Array.from(checkboxes)
    .filter((check) => check.checked)
    .map((check) => check.id);

  // Loop over products and check for matches
  productElements.forEach((productElement, index) => {
    const product = products[index];

    // Check to see if product matches the search or checked items
    const matchesSearchTerm = product.name.toLowerCase().includes(searchTerm);
    const isInCheckedCategory =
      checkedCategories.length === 0 ||
      checkedCategories.includes(product.category);

    // Show or hide product based on matches
    if (matchesSearchTerm && isInCheckedCategory) {
      productElement.classList.remove('hidden');
    } else {
      productElement.classList.add('hidden');
    }
  });
}
This function will get the search term and the checked categories. It will then loop over the products and check if the product matches the search term and the checked categories. If it does, it will remove the hidden class, if not, it will add the hidden class.
That's it. You should now have a fully functional product filtering UI. You can add products to the cart, filter by category and search for products. If you want to take it further, you can add a cart with local storage and a checkout page. You can also add more categories and products.
Stay connected with news and updates!
Join our mailing list to receive the latest news and updates from our team.
Don't worry, your information will not be shared.
We hate SPAM. We will never sell your information, for any reason.
