Build An Expense Tracker With Vue 3 & The Composition API
Nov 08, 2023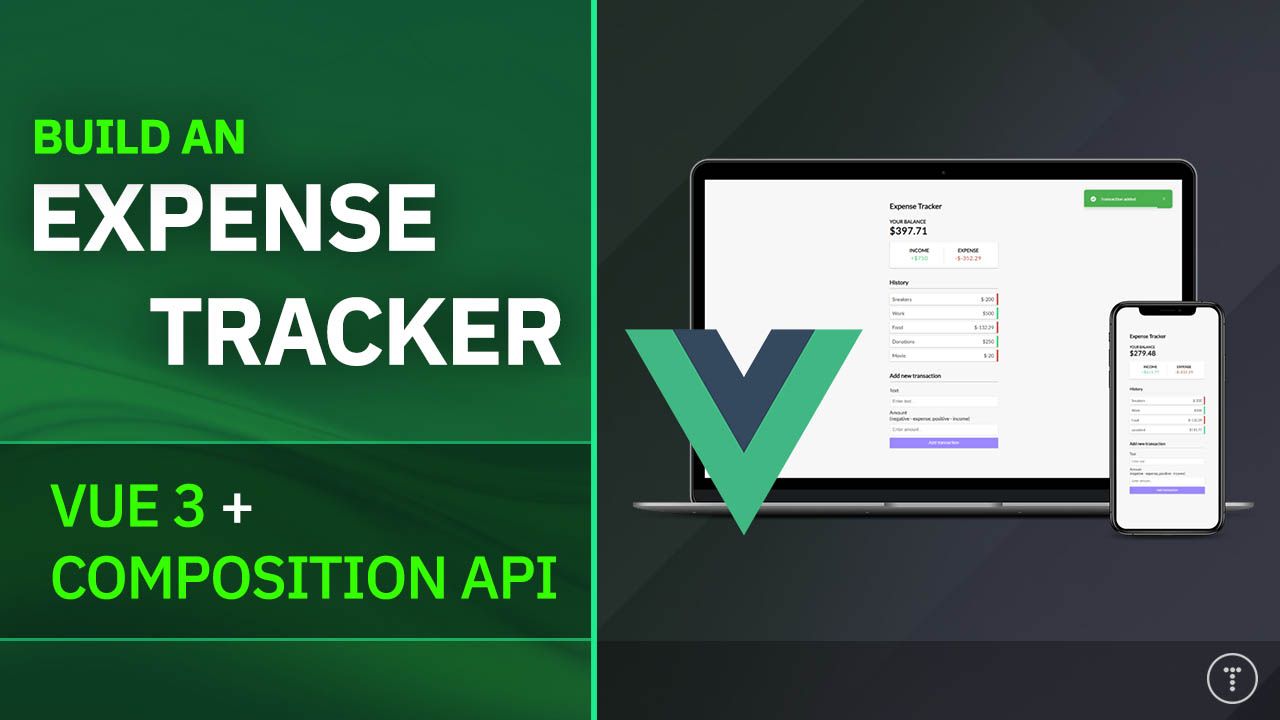
In this article, we are going to learn all about Vue.js version 3 and the composition API. We're going to create an expense tracker application in the process. If you already know Vue and the options API, it helps, however, even if you don't, you should be able to follow along and learn how to use Vue.js as long as you know JavaScript fundamentals.
What Is the Composition API?
Before we get started on the project, let's talk a little bit about the Composition API, which is a newer way of creating Vue.js applications that was released with Vue 3. It is an alternative to the Options API that has been used in Vue.js for a long time. The Options API organizes the component's logic by options – hence the name. You define your component's data, methods, computed properties, lifecycle hooks, and more as properties of an object literal.
It looks like this:
export default {
  data() {
    return {
      count: 0,
    };
  },
  methods: {
    increment() {
      this.count++;
    },
  },
};
Here, we have a data property of count and a method of increment.
The Composition API, on the other hand, organizes the component's logic by functions. It allows you to group logic by the function instead of by options. This makes it easier to reuse logic across components, and it also makes it easier to read and understand the code.
It looks like this:
import { ref } from 'vue';

export default {
  setup() {
    const count = ref(0);
    const increment = () => {
      count.value++;
    };

    return {
      count,
      increment,
    };
  },
};
Everything is wrapped in a setup function, although, there is a newer syntax that I'm going to show you in a second. We import ref from vue to create what are called called "reactive references." Reactivity is a fundamental concept in Vue.js, and it refers to the automatic updating of the UI when data changes. When we declare a variable as a reactive reference using ref, Vue.js tracks its changes and ensures that any part of the component relying on that data is automatically updated to reflect the latest value. This means you don't have to manually handle DOM updates or worry about synchronizing data with the user interface—Vue takes care of it for you. So the composition API offers a more organized way to embrace reactivity and promote code reusability.
3.2+ <script setup> Syntax
We will be using the new <script setup> syntax, which was introduced in Vue 3.2. It allows us to use the composition API without having to explicitly define the setup function. Just to be clear, we are still using the setup function, but we are using it as a script option instead of explicitly defining it. This is basically just syntactic sugar.
It looks like this:
<script setup>
  import { ref } from 'vue';

  const count = ref(0);
  const increment = () => {
    count.value++;
  };
</script>
The code inside the <script setup> tag is compiled as the content of the component's setup() function. So unlike a regular <script> tag, which only executes once when the component is first imported, code inside <script setup> will execute every time an instance of the component is created.
Here are some advantages over the normal syntax:
- More succinct code with less boilerplate
- Ability to declare props and emitted events using pure TypeScript
- Better runtime performance (the template is compiled into a render function in the same scope, without an intermediate proxy)
- Better IDE type-inference performance (less work for the language server to extract types from code)
- Top-level bindings are exposed to the template. This includes variables, functions and imports. We do not need to have a return that includes them.
The Composition API is not a replacement for the Options API. It is an alternative. You can use either one or both in the same application. I believe all of my Vue.js videos use the options API including the latest crash course, so I thought I would switch it up.
Project Setup
Let's start getting set up. Create a folder somewhere on your system and call it whatever you want. I'm going to call mine vue-expense-tracker. Open up your terminal and navigate to that folder. Then run the following command to create a new Vue.js project using the Vue CLI:
npx create-vue@latest .
It will take you through the following prompts:
- Project Name: vue-expense-tracker
- Add TypeScript: No
- Add JSX Support: No
- Add Vue Router: No
- Add Pinia: No
- Add Vitest: No
- Add E2E Testing Solution: No
- Add ESLint: No
You can select what you want, but we won't need most of this. We don't need the router, because there is only one main view.
Now, run the following:
npm install
npm run dev
It will run on port 5137. Open up your browser and go to localhost:5137. You should see the default Vue.js welcome page.
Initial Folder Structure
Let's take a look at the folder structure that was created for us. Open up the project in your code editor.
- You will see a
srcfolder. This is where all of our code will go. - Inside of the
srcfolder, you will see acomponentsfolder. This is where we will put our components. We'll have about 5 components for this project, each representing a part of the UI. Right now, there are just some boilerplate components that we will be removing. This is where the content that you are seeing in the browser is coming from. - You will also see an
assetsfolder. This is for things like CSS file and images. - There is also a
main.jsfile. This is the main entry point for our application and where the main Vue instance is created using thecreateAppfunction. Then it is mounted to the DOM using themountmethod and the#appelement. - If you open the
index.htmlfile, you will see that there is a div with an id ofapp. This is where our application will be rendered. - There is also an
App.vuefile in thesrcfolder. This is the main component that will be rendered in the DOM. We will be importing our other components into this one.
Vanilla JS Version
This project was initially a vanilla JavaScript project from my 20 Vanilla JS Projects Course. We are going to use the same HTML and CSS, but we are going to convert it to Vue.js and use the composition API.
Here is the GitHub Repo for the vanilla project.
The CSS
We are gong to keep the CSS simple and just use a global CSS file. In your Vue project, open the src/assets folder and you will see a base.css and a main.css file. Delete both of these and create a new file called style.css. This is where we will put our CSS. Copy everything from the vanilla project style.css file and paste it into the new style.css file.
Now open the src/main.js file and remove the import for the base.css file. Then add the following:
import './assets/style.css';
That takes care of the styling.
Page Title
If you want to change the page title, you can do that in the public/index.html file. Change the <title> tag to whatever you want. I will change it to "Expense Tracker".
The Components
When using a framework like Vue, React or Angular, it is common to break your application up into components. This makes it easier to manage and reuse code. We are going to break up our UI and create 5 components for this project:
Let's create the files for them now. In the src/components folder, create the following files:
- Header.vue
- Balance.vue
- IncomeExpenses.vue
- TransactionList.vue
- AddTransaction.vue
As you can see, Vue components us a .vue extension.
Remove the following files:
- HelloWorld.vue
- TheWelcome.vue
- WelcomeItem.vue
- icons folder
At this point, your app will break because the App.vue file is looking for things that we deleted.
Edit your App.vue file to look like this:
<template>My App</template>
Now we have a clean slate to work with.
The Header Component
Let's start with the header component. This is an extremely simple component that just has a heading.
Open up the Header.vue file and add the following:
<template>
  <h2>Expense Tracker</h2>
</template>
The <template> tag is where we put our HTML. In addition to that, we can also have a <script> tag where we can put our JavaScript and a <style> tag where we can put our CSS. We're using a global CSS file, so we don't have to worry about that. This particular component doesn't need any JavaScript, so we don't need the <script> tag either.
Now, let's import this component into our App.vue file. Add the following under the <template> tag:
<script setup>
  import Header from './components/Header.vue';
</script>
Here, we are importing the the component. Since we are using the new syntax, we do not have to explicitly register it. Now, we can use it in our template. Add the following INTO the <template> tag:
<template>
  <header />
</template>
Now you should see the heading.
The Balance Component
Next, let's create the balance component. This will show the total balance. Right now, it will just be a $0 balance with no JavaScript functionality. We will add that later. I want to get the UI in place first.
Open up the Balance.vue file and add the following:
<template>
  <h4>Your Balance</h4>
  <h1 id="balance">$0.00</h1>
</template>

In your `App.vue` file, import the component and add it to the template: ```html
<script setup>
  import Header from './components/Header.vue';
  import Balance from './components/Balance.vue';
</script>
<template>
  <header />
  <div class="container">
    <Balance />
  </div>
</template>
The IncomeExpenses Component
This component will show the total income and expenses. It will also have a border that separates the income and expenses.
Open up the IncomeExpenses.vue file and add the following:
<template>
  <div class="inc-exp-container">
    <div>
      <h4>Income</h4>
      <p id="money-plus" class="money plus">+$0.00</p>
    </div>
    <div>
      <h4>Expense</h4>
      <p id="money-minus" class="money minus">-$0.00</p>
    </div>
  </div>
</template>
Add the component to the App.vue file:
<template>
  <header />
  <div class="container">
    <Balance />
    <IncomeExpenses />
  </div>
</template>

<script setup>
  import Header from './components/Header.vue';
  import Balance from './components/Balance.vue';
  import IncomeExpenses from './components/IncomeExpenses.vue';
</script>
The TransactionList Component
This component will show the list/history of transactions. For now, we will hardcode some transactions in the component. Later, we will add functionality to add and delete transactions.
Open up the TransactionList.vue file and add the following:
<template>
  <h3>History</h3>
  <ul id="list" class="list">
    <li class="minus">
      Cash <span>-$400</span><button class="delete-btn">x</button>
    </li>
    <li class="plus">
      Salary <span>+$1000</span><button class="delete-btn">x</button>
    </li>
  </ul>
</template>
Add the component to the App.vue file:
<template>
  <header />
  <div class="container">
    <Balance />
    <IncomeExpenses />
    <TransactionList />
  </div>
</template>

<script setup>
  import Header from './components/Header.vue';
  import Balance from './components/Balance.vue';
  import IncomeExpenses from './components/IncomeExpenses.vue';
  import TransactionList from './components/TransactionList.vue';
</script>
The AddTransaction Component
This component will have a form to add a new transaction. It will have a text input for the name of the transaction and an input for the amount. It will also have two buttons, one for adding an income and one for adding an expense.
Open up the AddTransaction.vue file and add the following:
<template>
  <h3>Add new transaction</h3>
  <form id="form">
    <div class="form-control">
      <label for="text">Text</label>
      <input type="text" id="text" placeholder="Enter text..." />
    </div>
    <div class="form-control">
      <label for="amount"
        >Amount <br />
        (negative - expense, positive - income)</label
      >
      <input type="text" id="amount" placeholder="Enter amount..." />
    </div>
    <button class="btn">Add transaction</button>
  </form>
</template>
Add the component to the App.vue file:
<template>
  <header />
  <div class="container">
    <Balance />
    <IncomeExpenses />
    <TransactionList />
    <AddTransaction />
  </div>
</template>

<script setup>
  import Header from './components/Header.vue';
  import Balance from './components/Balance.vue';
  import IncomeExpenses from './components/IncomeExpenses.vue';
  import TransactionList from './components/TransactionList.vue';
  import AddTransaction from './components/AddTransaction.vue';
</script>
Alright, so we have the UI in place. Now, let's add some functionality.
Showing Transactions
Let's start by creating a hardcoded array of transactions in the TransactionList.vue component. We will use this to display the transactions in the list.
Open up the TransactionList.vue file and add the following under the <template> tag:
<script setup>
  const transactions = [
    { id: 1, text: 'Flower', amount: -19.99 },
    { id: 2, text: 'Salary', amount: 299.97 },
    { id: 3, text: 'Book', amount: -10 },
    { id: 4, text: 'Camera', amount: 150 },
  ];
</script>
Now, we need to loop through the transactions and output them in the list. We can do this using the v-for directive. Add the following to the <ul> tag:
<ul id="list" class="list">
  <li v-for="transaction in transactions" :key="transaction.id">
    {{ transaction.text }} <span>${{ transaction.amount }}</span
    ><button class="delete-btn">x</button>
  </li>
</ul>
So we are looping through the transactions array and outputting the text and amount properties. We are also using the :key directive to set the id as the key. This is required when using v-for.
We need to add a class of minus if the amount is negative and a class of plus if the amount is positive. This will give it either a green or red border. We can do this using the :class directive. Add the following to the <li> tag:
<li
  v-for="transaction in transactions"
  :key="transaction.id"
  :class="transaction.amount < 0 ? 'minus' : 'plus'"
></li>
You could add this to a function in the <script> tag, but it's not necessary. We can just do it inline.
Moving Data to the App Component
The transaction data is what we call global or app-level state, meaning that it needs to be available to all components. We need to move it to the App.vue component.
Delete the transaction array from the TransactionList.vue file and add it to the App.vue file. We are going to make a change though. We want the transactions to be reactive. Meaning that if we add or delete a transaction, it will update the UI. To do this, we need to use the ref function from the vue package.
Add the following to the App.vue component:
<script setup>
  // ... other imports
  import { ref } from 'vue';

  const transactions = ref([
    { id: 1, text: 'Flower', amount: -19.99 },
    { id: 2, text: 'Salary', amount: 299.97 },
    { id: 3, text: 'Book', amount: -10 },
    { id: 4, text: 'Camera', amount: 150 },
  ]);
</script>
The app will break because we are not yet using the transactions in the App.vue file. We need to pass it down to the TransactionList.vue component. We can do this using a prop. Add the following to the <TransactionList /> component in the App.vue file:
<TransactionList :transactions="transactions" />
Now, in the TransactionList.vue file, we need to define the transactions prop. Add the following to the <script> tag:
<script setup>
  import { defineProps } from 'vue';

  const props = defineProps({
    transactions: {
      type: Array,
      required: true,
    },
  });
</script>
Now you should see the transactions in the list.
Balance Component
Next, we will add the functionality to the Balance.vue component. This component will show the total balance. It will also show the total income and expenses. We will do this by looping through the transactions and adding up the amounts. We will do the calculation within the App.vue file and pass the data down to the Balance.vue component.
In the App.vue file, add the following under the transactions variable:
<script setup>
  // ... other imports
  import { ref, computed } from 'vue'; // IMPORT 'computed'

  const transactions = ref([
    { id: 1, text: 'Flower', amount: -19.99 },
    { id: 2, text: 'Salary', amount: 299.97 },
    { id: 3, text: 'Book', amount: -10 },
    { id: 4, text: 'Camera', amount: 150 },
  ]);

  // Get total
  const total = computed(() => {
    return transactions.value.reduce((acc, transaction) => {
      return acc + transaction.amount;
    }, 0);
  });
</script>
Here, we are using the computed function to create a computed property called total. We are using the reduce method to add up the amounts. We are also using the ref function to make the transactions reactive. This will make it so that if we add or delete a transaction, the total will update.
Now, let's pass the total down to the Balance.vue component. Add the following to the <Balance /> component in the App.vue file:
<Balance :total="total" />
Now, in the Balance.vue file, we need to define the total prop. Add the following to the <script> tag:
<script setup>
  import { defineProps } from 'vue';

  const props = defineProps({
    total: {
      type: Number,
      required: true,
    },
  });
</script>
Change the template to look like this:
<template>
  <h4>Your Balance</h4>
  <h1 id="balance">${{ total }}</h1>
</template>
Now you should see the total balance.
IncomeExpenses Component
Next, we will add the functionality to the IncomeExpenses.vue component. This component will show the total income and expenses. We will do this by looping through the transactions and adding up the amounts. We will do the calculation within the App.vue file and pass the data down to the IncomeExpenses.vue component.
In the App.vue file, add the following under the total variable:
// Get income
const income = computed(() => {
  return transactions.value
    .filter((transaction) => transaction.amount > 0)
    .reduce((acc, transaction) => acc + transaction.amount, 0)
    .toFixed(2);
});

// Get expenses
const expenses = computed(() => {
  return transactions.value
    .filter((transaction) => transaction.amount < 0)
    .reduce((acc, transaction) => acc + transaction.amount, 0)
    .toFixed(2);
});
We are using filter to get the income and expenses based on if the amount is greater than or less than 0. Then we are using reduce to add up the amounts. We are also using toFixed to format the number to 2 decimal places.
Now, let's pass the income and expenses down to the IncomeExpenses.vue component. Add the following to the <IncomeExpenses /> component in the App.vue file:
<IncomeExpenses :income="+income" :expenses="+expenses" />
We added a + sign before the income and expenses variables. This is because we are passing them down as strings, so we need to convert them to numbers.
Now, in the IncomeExpenses.vue file, we need to define the income and expenses props. Add the following to the <script> tag:
<script setup>
  import { defineProps } from 'vue';

  const props = defineProps({
    income: {
      type: Number,
      required: true,
    },
    expenses: {
      type: Number,
      required: true,
    },
  });
</script>
The template should look like this:
<template>
  <div class="inc-exp-container">
    <div>
      <h4>Income</h4>
      <p id="money-plus" class="money plus">+${{ income }}</p>
    </div>
    <div>
      <h4>Expense</h4>
      <p id="money-minus" class="money minus">-${{ expenses }}</p>
    </div>
  </div>
</template>
Now you can see the total income and expenses.
The Form
Now we need to tackle the form in the AddTransaction.vue component. We want to be able to add a transaction and have it show up in the transaction list. We also want it to save to local storage. Let's start by just creating a submit event listener for the form and having it log something to the console. Open the AddTransaction.vue file and add the following to the <form> tag:
<form id="form" @submit.prevent="onSubmit"></form>
Here, we are adding an event listener for the submit event. We are also adding the .prevent modifier, which prevents the default behavior of the form, which is to submit to a file or URL. We don't want that. We want to handle the submit ourselves.
Add this to the <script> tag:
<script setup>
  const onSubmit = () => {
    console.log('submit');
  };
</script>
Now when you submit the form, you should see submit logged to the console.
Binding Form Data
Now, let's bind the form data to the component's data. We can do this using the v-model directive. Add the following to the <input> tags:
<input type="text" id="text" placeholder="Enter text..." v-model="text" />
<input type="text" id="amount" placeholder="Enter amount..." v-model="amount" />
Now, we need to add the text and amount data properties to the component. Add the following to the <script> tag:
<script setup>
  import { ref } from 'vue';

  const text = ref('');
  const amount = ref('');

  const onSubmit = () => {
    console.log(text.value, amount.value);
  };
</script>
By using ref, the values are reactive, allowing their values to be tracked and updated in response to user input. We get the value by using the .value property.
Submit the form and you should see the text and amount logged to the console.
Form Validation & Vue Toastification
Let's add a bit of validation to make sure that the user enters a text and an amount. We can use the vue-toastification library to show a toast message if the user doesn't enter anything. Open up your terminal and run the following command to install the library:
npm install vue-toastification@next
We need to change the main.js a little bit to use the plugin. Your main.js file should look like this:
import { createApp } from 'vue';
import Toast from 'vue-toastification';
import 'vue-toastification/dist/index.css';
import './assets/style.css';
import App from './App.vue';

const app = createApp(App);
app.use(Toast);
app.mount('#app');
Validation and Display
Now, change your AddTransaction.vue JavaScript to look like this:
<script setup>
  import { useToast } from 'vue-toastification';
  import { ref } from 'vue';

  const text = ref('');
  const amount = ref('');

  // Get toast interface
  const toast = useToast();

  const onSubmit = () => {
    if (!text.value || !amount.value) {
      // Display a toast error message if either field is empty
      toast.error('Both fields must be filled.');
      return;
    }

    // Proceed with form submission logic here...
    console.log('Form submitted:', text.value, amount.value);

    // Clear form fields
    text.value = '';
    amount.value = '';
  };
</script>
We are initializing the toast variable with the useToast function. Then we are using the toast variable to display an error message if either field is empty. We are also clearing the form fields after the form is submitted.
Custom Event & Emit
Now that we can get the values and validate the form, we need to emit an event to the parent component, which is the App.vue file. We will do this using a custom event and the emit function.
In the AddTransaction.vue file and add the following under the text and amount variable declarations:
const emit = defineEmits(['transactionSubmitted']);
Now, replace the console.log with the following:
// Emit a custom event with the transaction data
const transactionData = {
  text: text.value,
  amount: parseFloat(amount.value),
};

emit('transactionSubmitted', transactionData);
What this is doing is creating an object with the transaction data and then emitting a custom event called transactionSubmitted with the transaction data as the payload.
Now, we need to listen for this event in the App.vue file. In the App.vue template, add the following to the <AddTransaction /> component:
<AddTransaction @transactionSubmitted="handleTransactionSubmitted" />
Now add the following to the <script> tag:
const handleTransactionSubmitted = (transactionData) => {
  console.log(transactionData);
};
Now you should see the transaction data logged to the console when you submit the form.
Adding Transactions
Since everything is reactive, we can just push the new transaction to the transactions array. Add the following to the handleTransactionSubmitted function:
const handleTransactionSubmitted = (transactionData) => {
  transactions.value.push({
    id: generateUniqueId(),
    text: transactionData.text,
    amount: transactionData.amount,
  });
};
Now create a simple function to generate a random ID:
const generateUniqueId = () => {
  return Math.floor(Math.random() * 1000000);
};
Now you should see the new transaction in the list.
Adding a Toast Message
We can show a toast when we add a transaction.
In the App.vue file, add the following to the <script> tag:
import { useToast } from 'vue-toastification';

const toast = useToast();
Add the following to the handleTransactionSubmitted function:
const handleTransactionSubmitted = (transactionData) => {
  transactions.value.push({
    id: generateUniqueId(),
    text: transactionData.text,
    amount: transactionData.amount,
  });

  toast.success('Transaction added.');
};
Now you should see the notification when you add a transaction.
Deleting Transactions
Now, let's add the functionality to delete a transaction. We will do this by emitting a custom event from the TransactionList.vue component and listening for it in the App.vue component. We will then filter out the transaction with the matching ID.
In the TransactionList.vue file, add a click handler on the button:
<button class="delete-btn" @click="deleteTransaction(transaction.id)">x</button>
Now, add the following to the <script> tag in the TransactionList.vue file:
const emit = defineEmits(['transactionDeleted']);

const deleteTransaction = (id) => {
  emit('transactionDeleted', id);
};
This will emit a custom event. We then want to listen for this event in the App.vue file. Add the following to the <TransactionList /> component:
<TransactionList
  :transactions="transactions"
  @transactionDeleted="handleTransactionDeleted"
/>
Add the function to the <script> tag:
const handleTransactionDeleted = (id) => {
  transactions.value = transactions.value.filter(
    (transaction) => transaction.id !== id
  );

  toast.success('Transaction deleted.');
};
Now you should be able to add and delete transactions.
Local Storage
So we have the functionality working, but if we refresh the page, the transactions will be gone. We want to save them to local storage so that they persist.
In the App.vue file, set the transactions to an empty array to begin with:
const transactions = ref([]);
In the App.vue file, add the following to the <script> tag:
import { ref, computed, onMounted } from 'vue'; // Import onMounted

onMounted(() => {
  const savedTransactions = JSON.parse(localStorage.getItem('transactions'));

  if (savedTransactions) {
    transactions.value = savedTransactions;
  }
});
onMounted is a lifecycle hook that runs when the component is mounted to the DOM. Here, we are getting the transactions from local storage and setting the transactions variable to the saved transactions.
Everything should go to 0 unless you have some transactions saved in local storage.
Now, we need to save the transactions to local storage when we add or delete a transaction. Crate the following function in the App.vue file:
// Save transactions to local storage
const saveTransactionsToLocalStorage = () => {
  localStorage.setItem('transactions', JSON.stringify(transactions.value));
};
Now, call this function in the handleTransactionSubmitted and handleTransactionDeleted functions:
const handleTransactionSubmitted = (transactionData) => {
  transactions.value.push({
    id: generateUniqueId(),
    text: transactionData.text,
    amount: transactionData.amount,
  });

  saveTransactionsToLocalStorage();

  toast.success('Transaction added.');
};
const handleTransactionDeleted = (id) => {
  transactions.value = transactions.value.filter(
    (transaction) => transaction.id !== id
  );

  saveTransactionsToLocalStorage();

  toast.success('Transaction deleted.');
};
Your application is now complete. You can add and remove transactions and they will persist in local storage. The balance, expenses and income will update accordingly because everything is reactive.
Stay connected with news and updates!
Join our mailing list to receive the latest news and updates from our team.
Don't worry, your information will not be shared.
We hate SPAM. We will never sell your information, for any reason.
